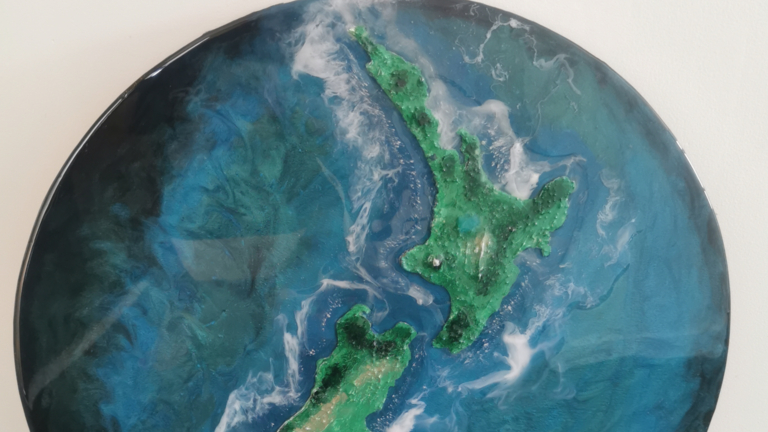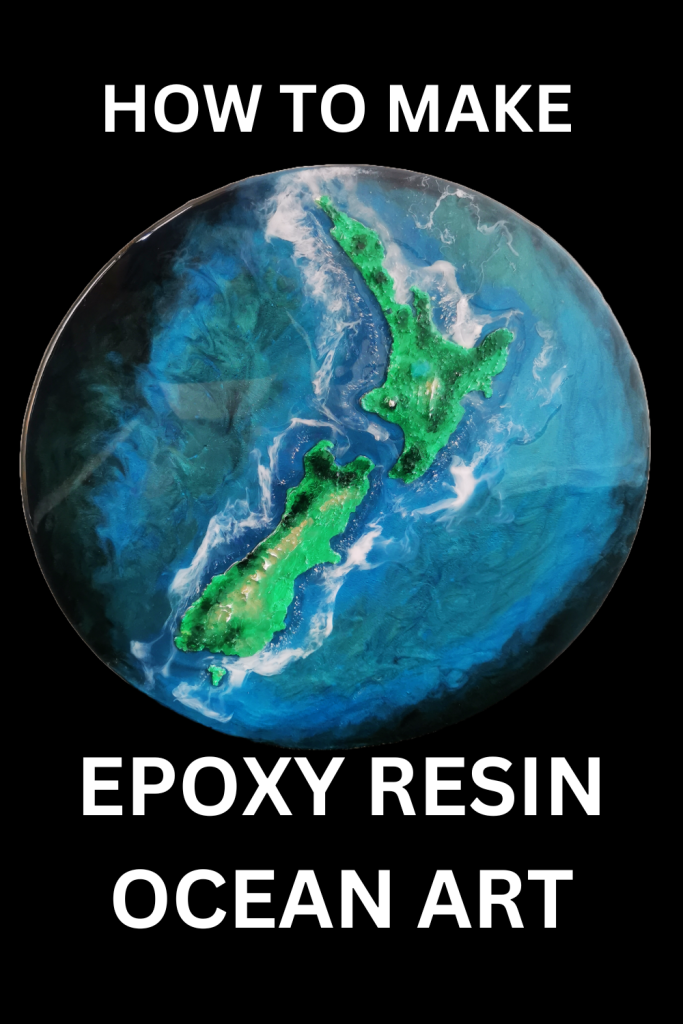


Welcome to the Art Lab! My name is Andy, and I’m excited to show you how to create ocean art with resin. Today, we’ll be making a New Zealand-inspired piece, but you can use this technique to create any kind of ocean scene with islands that you want (Real or Fictional).
I was inspired by the many Ocean dioramas that I have seen on YouTube with Islands, palm trees, boats etc.
Resin Ocean dioramas are a fun and creative way to bring the beauty of the ocean into your home. They can be made with a variety of materials, including 3D printing, modeling paste, paper mache, and resin. Creating an ocean scene or diorama is a process that takes time and patience. However, the end result is a beautiful and unique piece of art that will bring you joy for years to come.
My goal was to create something a little simpler with just the islands, especially due to the scale of the New Zealand islands (New Zealand is about the same land mass/size as the UK or the state of Colorado), so let’s jump into the process I went through.
If you have any questions about this artwork please feel free to jump onto YouTube and ask it in the comments of this video. While you are there if you are not a subscriber already, it would be great to have you become one to join and follow along my art journey.
OCEAN ART TABLE OF CONTENTS:
Alternative Materials for the Model
Step 1: Creating the Template
The first step is to create your islands. I used a 3D printer to print out a map of New Zealand, but you can also use a map or image and trace it onto a piece of cardboard or thin plywood. Print or cut out the islands and make sure they’re about 4 millimeters high. This will help them stand up from the resin when it’s poured.
Alternatives to 3D Printed Model
Many different materials can be used to create the islands for a Resin Ocean art project. Some popular options include using a map or image and tracing it onto a piece of cardboard or thin plywood or MDF, using modeling clay, or building them up with layers of papier-mâché. If you are using a 3D printer, it is important to make sure that the islands are high enough so that they do not get covered by the resin when it is poured. You can also use a variety of colors for the islands to create a more realistic or abstract look.
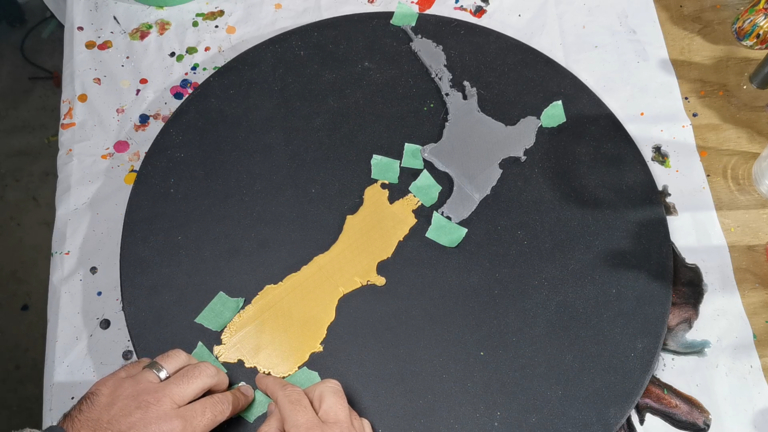
Step 2: Gluing it Down
Next, glue the islands down to a round wooden board. Of course the board can be any shape you want, but I like the round look for wall art.
I painted my board black to help create a contrast with the ocean colors. You can use any color you like, or you can leave the board natural.
A helpful tip is to put painter’s tape around the edges of the islands before you glue them down. This will make it easier to line them up evenly.
Add PVA glue to the back of your island template and position it on the art board.
Once the PVA glue is dry, you can remove the tape that helped you position the islands.
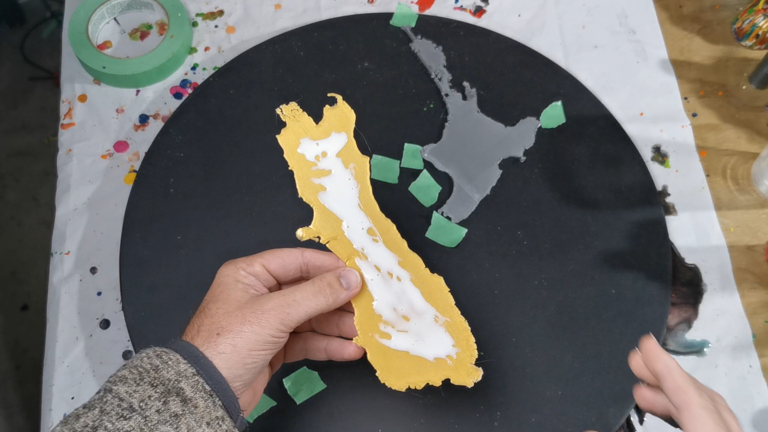
Step 3: Building the Terrain
Now it’s time to start building the terrain. Cover the 3D print with modeling paste. This will help you create the contours and definition of the islands.
Working with modeling paste can be a bit messy and take a bit of time but the results are worth it.
The first step is to put down a base layer of modeling paste. Once that layer is dry, you can add another layer and start adding the contours.
I used a sponge to dab the wet modeling paste to add hills and other details to the islands. I wanted to make sure that some of the New Zealand landmarks were prominent, so I included Mount Taranaki, Mount Ruapehu, and Lake Taupo. I did this by removing dry modeling paste with a craft knife for Lake Taupo, adding some additional modeling paste for the mountains, and shaping them with a pallet knife.

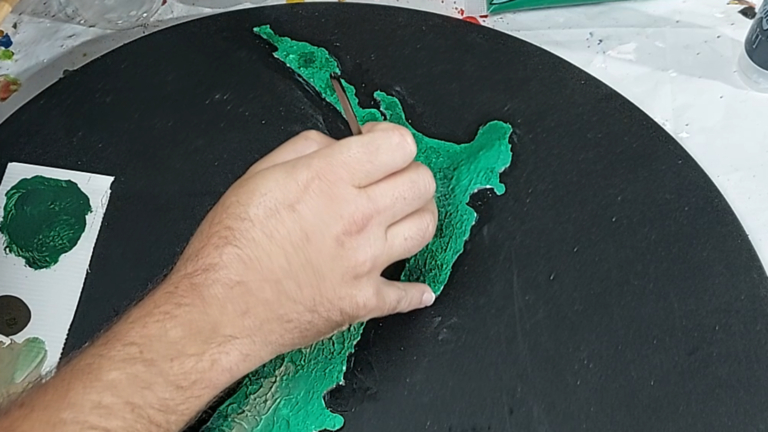
Step 4: Painting the Island
Now it’s time to paint the islands. The base color is green, but you can add additional colors to create different landscapes. I added some darker green for the forest areas and light brown for the areas with less vegetation.
I also painted the mountains white to represent snow.
I used acrylic paint for the painting of the islands, and it turned out great.
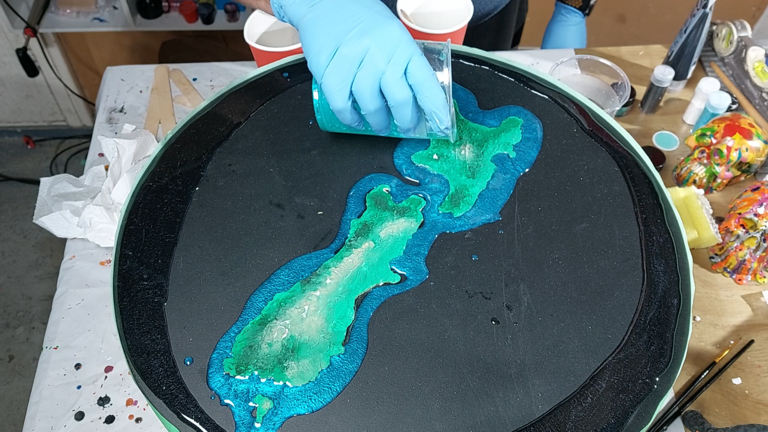
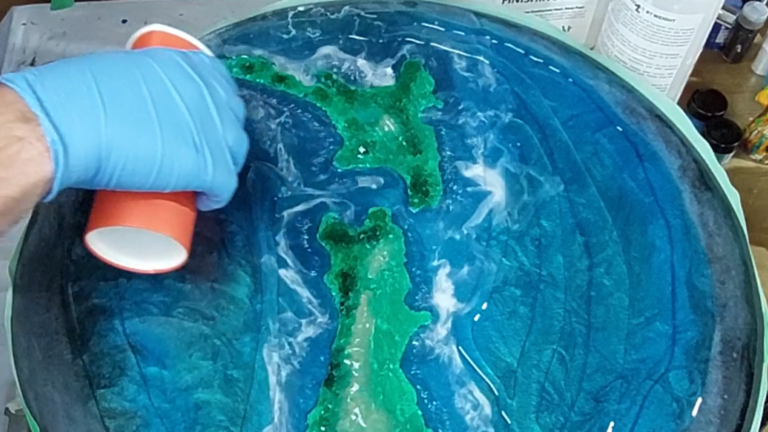
Step 5: Adding Resin
Once the paint is dry, it’s time to add the resin. I used three different colors of resin: black, light blue, and aqua blue. Mica powder was used to color the resin for each of these colors.
The black resin will go around the edge of the map to create a border. The light blue will go around the islands to give them a watery appearance, and the aqua blue will be used for the middle of the ocean.
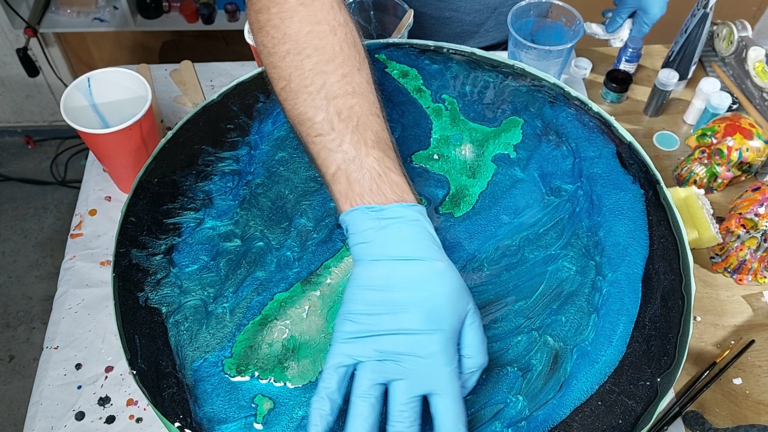
I used my gloved hand to blend the different areas of resin color to make this resin ocean artwork.
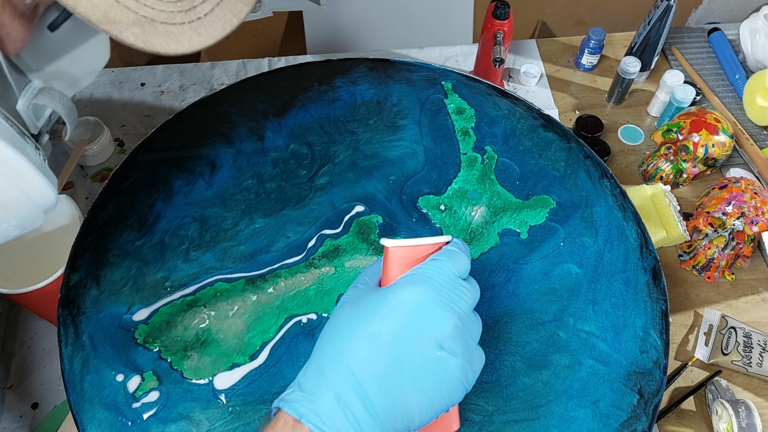
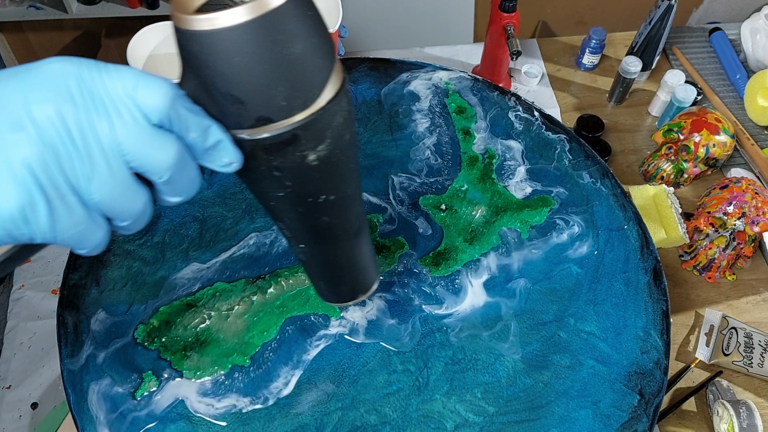
Step 6: Creating the Waves
The key to creating realistic-looking waves is using a hair dryer or heat gun to try to create cells in the resin. I started by pouring a layer of clear resin around the outside of the islands. Then, I tried but failed to do a thin line of white on top of the clear layer I just poured. The theory is that the clear will help spread the white across the surface and hopefully create that wispy wave-like appearance. I think next time I will use a toothpick or syringe to control the volume of white that comes out as I got a bit too heavy-handed with the while that I poured.
Its all about experimenting to find out what works and learning from each artwork that you do.
Once the white resin was in place, I used the hair dryer to blow across the surface. This caused the white resin to spread out across the surface and create whispy white waves.
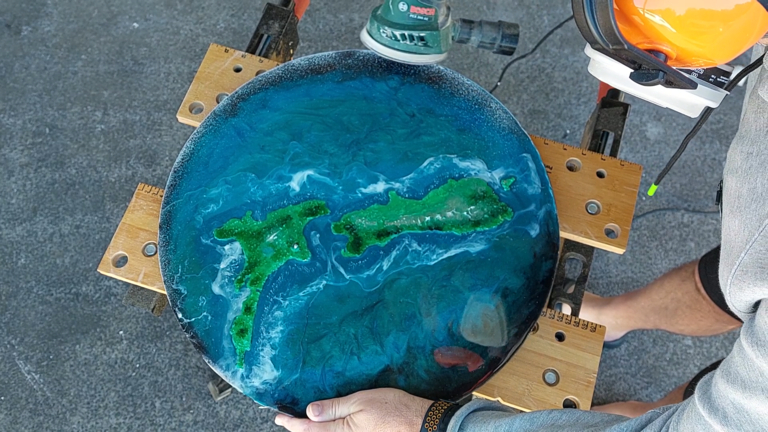
Step 7: Sanding
Once the resin is dry, you’ll need to sand it down to create a smooth surface since the edge will most likely have a lip to it from it shrinking less in the area that touched the painter’s tape. This is known as “surface tension shrinkage.” This occurs when resin shrinks as it cures but experiences less shrinkage when it is in contact with a surface. You will notice this when using resin molds.
I used an orbital sander to sand the edges of the board and the top of the resin ready for a final coat.
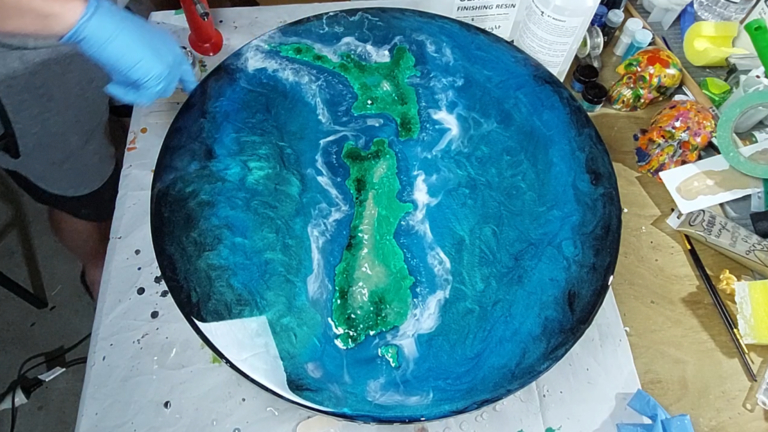
Step 8: Clear Resin Coat
The final step is to apply a clear coat of resin to protect the artwork. I used painter’s tape again to hold the level of clear resin to a consistent level for around 10 minutes so that the resin had time to cure a little and not drip off the edge.
After ten minutes I removed the painter’s tape and allowed the resin to drip over the edge. Using my gloved finger I ran this around the edge of the artwork to seal the edge with resin. Doing it this way it prevents all the resin running off the side but also avoids the surface tension issue we talked about above.
Final Thoughts
Ocean art with resin is a fun and rewarding project. It’s a great way to learn about resin art and to create a beautiful piece of art for your home. This type of artwork can either add some picture hardware and hang on the wall or if you add a few more layers of clear resin so the island is completely covered, you can turn this into an amazing side table by adding some pin table legs.
I hope you enjoyed this tutorial and that you’ll try making your own Epoxy Resin Ocean Art project.
TIPS:
To create realistic ocean art with resin, there are a few tips that can help you achieve the desired effect.
First, it is important to use high-quality materials. This includes using resin that is designed for art projects. Since we are not pouring very deep you don’t need casting resing for this artwork. finding a good finishing or art resin is important for the success of the project.
Second, it is important to work in layers. When building the terrain, start with a base layer of modeling paste and then add additional layers as needed. I used 3 layers of modeling paste for example to get my finished islands. This will help to create a more realistic and textured surface.
Third, be patient. Creating ocean art with resin is a process that takes time and patience. It is important to allow each layer to dry completely before moving on to the next.
Fourth, experiment with different colors and techniques. There are many different ways to create ocean art with resin, so experiment with different colors and techniques to find the look that you like best.
Fifth, have fun! Creating ocean art with resin is a fun and rewarding process. So relax and enjoy the process of creating your own unique masterpiece.