A Complete Beginner’s Guide
Welcome to Andy’s Art Lab! If you’re new to resin art or just looking to perfect your prep techniques, you’ve come to the right place. Today, we’re diving into everything you need to know about preparing MDF (medium-density fiberboard) for resin. MDF is a fantastic, smooth surface that’s popular among resin artists, but it needs a bit of prep to really make your art shine.
Along the way, we’ll also touch on prepping other surfaces like wood, canvas, and glass, so you can decide which is best for your next resin masterpiece. Let’s get started!

Why MDF? The Perfect Beginner-Friendly Surface
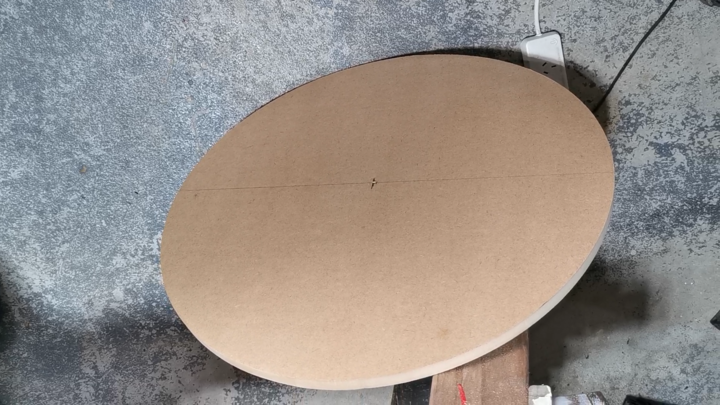
MDF is a compressed wood product that’s smooth, dense, and relatively easy to work with, making it an ideal choice for resin beginners. Its texture allows resin to spread evenly, creating a flawless finish, and it’s versatile enough for a range of styles. Unlike wood with heavy grains, MDF has a flat surface that doesn’t require heavy sanding, making it easier to prepare.
Other surfaces like wood, canvas, and even glass are also great for resin art, but each requires a bit of a different approach to achieve the best results.
Preparing MDF for Resin: Step-by-Step Guide
MDF is user-friendly, but it still needs some preparation to ensure the resin sticks well and doesn’t soak in or bubble. Here’s a simple process to follow.
1. Sand the Surface
Sanding is essential to ensure resin adheres smoothly. Grab some 120-180 grit sandpaper and lightly sand all sides of the MDF board, including edges and corners. This slight texture allows the resin to bond better without closing off too many pores.
Tip: Don’t over-sand! Going above 180 grit might smooth the surface too much, making it harder for the resin to grip.
2. Clean the Surface
After sanding, wipe down your MDF with a damp cloth or a bit of isopropyl alcohol. This removes dust and particles left from sanding, which can interfere with the resin finish.
3. Prime the Surface (Optional)
While not necessary for all MDF pieces, priming can be helpful, especially if you’re using paint or have a porous MDF surface. Use a layer of gesso, emulsion, or acrylic paint as a primer, and let it fully dry for about two weeks. This will create a seal, stopping the resin from absorbing into the wood and giving you a smooth, consistent finish.
Pro Tip: A primer helps with avoiding air bubbles in Resin, especially on larger MDF pieces.
4. Tape the Edges
Use high-quality painter’s tape, like Scotch Blue Advanced Edge Lock, around the edges of your MDF board. This keeps resin from spilling over and sticking where you don’t want it. Apply the tape right up to the edge and leave a tiny gap so the resin slightly overflows, creating a lip you can sand down later.
5. Seal the Back
If you’re using MDF for a table or a piece that might get flipped over, seal the back with an acrylic paint layer to protect it and put some painter’s tape around the edge to easily remove any resin drips. This simple step makes cleanup easy and keeps your piece looking professional.
6. Pour the Resin!
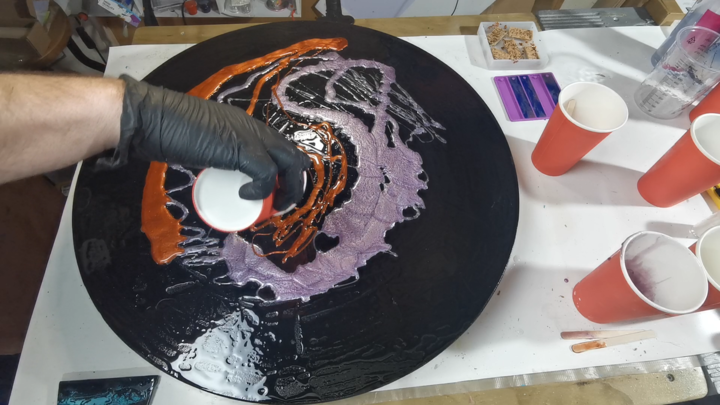
Once your MDF is prepped and ready, it’s time to pour! Follow the resin manufacturer’s guidelines for mixing, apply your first layer, and be mindful of bubbles. Using a torch can help pop bubbles that appear on the surface.

Prepping Other Surfaces for Resin Art
While MDF is fantastic, other surfaces like wood, canvas, and glass can work beautifully too. Here’s a quick look at how to prepare them:
Wood
- Sand: Use 120-180 grit sandpaper to remove oils and varnishes.
- Seal: Apply a thin penetrating seal coat of resin to avoid bubbles if you’re working with softer woods.
- Tape: Leave a hair’s width gap for a slight resin overhang, which can be sanded for a clean finish.
Canvas
- Prime: Most canvases are pre-gessoed, but you can add an extra layer for durability.
- Back Seal: For larger canvases, a flood coat of resin on the back can prevent sagging.
- Tape Edges: Apply tape along the rounded edge to manage resin drips effectively.
Glass & Plastic
- Light Sanding: Give smooth surfaces like glass or plastic a light sand to improve adhesion.
- Clean: Wipe down with isopropyl alcohol to ensure a clean surface for resin application.
FAQs: Resin Art and Supplies
What Kind of Wood is Best for Resin Art?
Birchwood, MDF, and even canvas are all popular choices. Birchwood offers a pre-sanded surface, MDF is dense and smooth, and canvas provides a flowing “waterfall” effect.
Do I Need to Prime MDF Before Using Resin?
Priming is optional for MDF, though it can help with bubble control. Gesso, acrylic paint, or emulsion work well as primers and should be fully dry before resin application.
How Much Do Resin Art Supplies Cost?
Here’s a quick breakdown:
- Resin: $20-50, depending on the brand and amount.
- MDF boards: $10-20 each, depending on size.
- Primer (optional): $5-10.
- Sandpaper: $3-7 per pack.
- Painter’s tape: $5-10.
Starting resin art can cost around $50-100, depending on your materials, but these supplies will last for multiple projects.
Can I Use Resin on Painted Surfaces?
Yes, but ensure the paint is fully dry. Applying resin too soon can cause discoloration or uneven curing. It’s best to wait 24-48 hours or longer for thicker paint layers.
How Do I Prevent Air Bubbles in Resin?
Mix slowly to avoid bubbles, and torch gently. If bubbles persist, consider applying a thin penetrating seal coat before your main pour.
What’s the Ideal Thickness for Resin Layers?
Most resins pour best at 1/8 inch per layer. Thicker layers may need to be poured gradually to prevent overheating.
Glossary of Key Terms
Here’s a quick glossary to help you with resin terminology:
- Acrylic Paint: Water-based paint that can double as a primer for resin.
- Curing: The hardening process of resin after mixing.
- Epoxy Resin: A two-part resin system that creates a clear, durable finish.
- Gesso: A primer commonly used to prep canvas and wood for painting or resin.
- MDF (Medium-Density Fiberboard): A dense wood composite popular in resin art.
- Penetrating Seal Coat: A thin layer of resin that prevents air bubbles on porous surfaces.
- Torching: Using heat to remove air bubbles in resin, enhancing clarity.
Final Thoughts
Preparing MDF for resin might seem like a lot at first, but it’s pretty straightforward once you get the hang of it. A little extra effort in the beginning ensures a smoother, bubble-free finish that looks fantastic. Whether you’re a beginner or looking to level up, taking the time to prep your surfaces makes all the difference in the final look.
Got questions about materials or techniques? headover to YouTube and drop a comment in my latest video and I will answer it. Check out more tips and tutorials here at Andy’s Art Lab. Now, go make something amazing!


