


Introduction
Hey there, fellow artists and resin enthusiasts! It’s Andy from Andys Art Lab, and today, we’re going to delve into the fascinating world of making round artboards. These circular beauties are incredibly versatile and can be used for various art projects, from resin pouring to acrylic painting as well as a smorgasbord of mixed media.
I’ll walk you through the process step by step so you can create your own stunning artboards like a pro. The process is straightforward and you will spend more time in the preparation and finishing tasks than the actual creation of the art panels.
Materials and Tools You’ll Need
Before we start crafting our round artboard, let’s gather the necessary materials and tools:
Materials:
- Plywood or Medium Density Fiberboard (MDF)
- Sandpaper (various grits)
- Wood Finish or Paint (optional)
- Safety Glasses
- Ear Protection (ear muffs)
- Measuring Tape or Ruler
- Pencil

Tools:
- Router with a quarter-inch straight bit or spiral bit
- Router bits
- Router Attachment with Pivot Point
- Orbital Sander
- Sawhorses or Workbench
- Drill
- Clamps (optional)

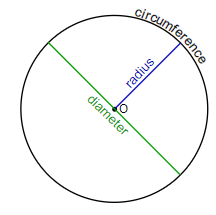
Step 1: Calculate the Diameter and Radius
The first thing we need to do is determine the size of our circle. In the example in my YouTube video, I’m creating a circle with a diameter of 500 millimeters (about 20 inches). To calculate the radius, simply divide the diameter by 2, which gives us 250 millimeters (approximately 10 inches).
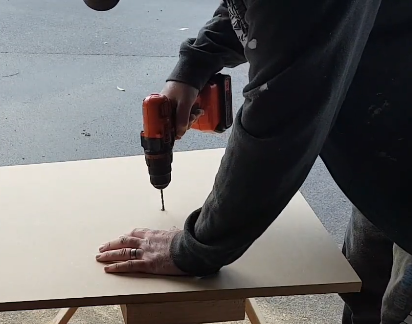
Step 2: Find the Center of the artboard
Mark the center of your MDF board. This is where the Pivot Point of your router will go. Ensure that the diameter of the circle can fit comfortably within the board. If your board allows, you can mark multiple centers for cutting out several circles.
Step 3: Set Up Your Router
Attach the router attachment with the Pivot Point to your router. Make sure the plunge depth is set to its neutral position.
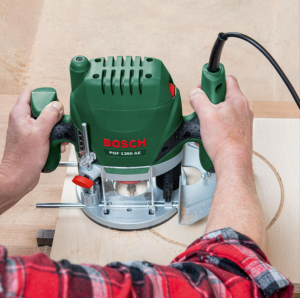
Step 4: Make the Initial Cut
For the first pass, don’t cut all the way through. Instead, go halfway around the circle. This helps prevent splintering and gives you a guide for the final cut.
Step 5: Make the Final Cut
On the second pass, you can plunge the router all the way down and slowly go around the circle to complete the cut. Be cautious when making the final cut to prevent the board from moving.
Step 6: Smooth and Sand
After cutting out your circle, use a round-over bit to remove sharp edges and give the board a smooth finish. Sand the surface with various grits of sandpaper until it’s silky-smooth. I used 120grit to do this on my board.
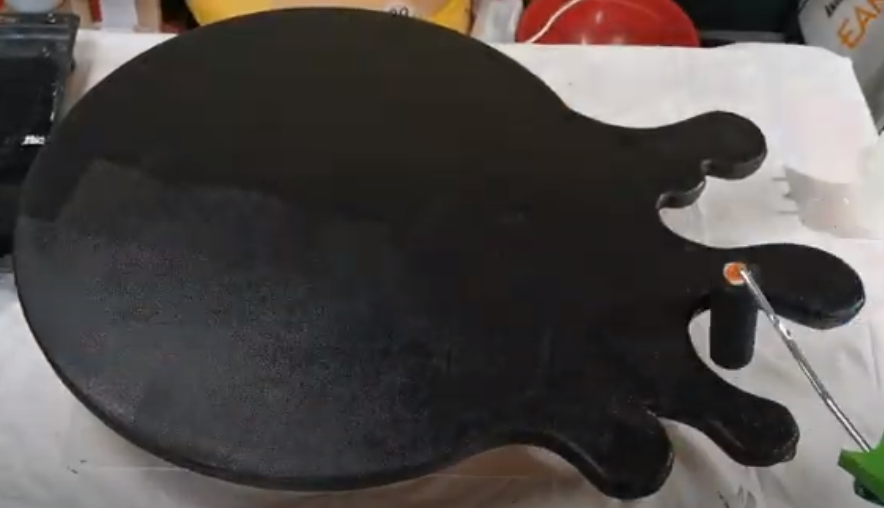
Step 7: Optional Creativity
Feel free to get creative with your round artboard. Add unique touches, shapes, or designs to make it truly your own. In preparation for your artwork on the panel, you can paint it to seal the wood or even apply a wood finish. When doing resin painting on my art boards I normally just seal it with clear resin.
Conclusion
And there you have it, a beautifully crafted round artboard ready for your artistic creations. I hope this step-by-step guide was helpful for you. If you found it useful, consider subscribing to my newsletter below, as well as to my YouTube channel where I release Art videos weekly.
Thanks for joining me in the art lab today! Until next time, keep creating and exploring the wonderful world of art.