


Lately, I’ve been making crayon paintings and with making these paintings, you get a lot of wasted melted crayon when changing colors in the modified glue gun. As you may know, I like to reuse and recycle and not let any bit of leftover material go to waste. I have managed to create some crayon and resin artwork and crafts by experimenting with mixing these two mediums.
I’ve got four easy projects that you can make using a combination of crayons and resin that can use these wasted crayons or if you want you can make these as your primary art piece.
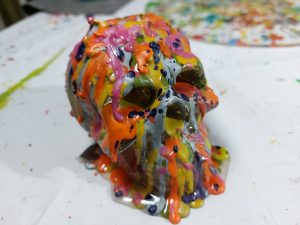
PROJECT 1: Crayon on Resin Skull
The first project is dripping excess crayon onto an object.
I am using a resin skull that I didn’t like how the original artwork turned out. It’s now become the perfect object to drip crayons onto. You can do this with a modified glue gun or if you were doing this as your main project you can melt crayons with a hair dryer or heat gun to drip onto the object. Once the crayon is dry, mix up some resin and cover it with it.
This will make it extra strong and protect the crayon from breaking off.
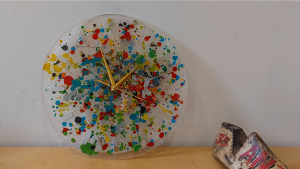
PROJECT 2: Large Clock
The second project is to use a silicone mold of a clock and drip excess crayon onto the silicon mold. It is good to drop the melted crayon from a height to get some great crayon splashes.
Once you have the covering you want you can then mix and pour the resin. I use my DIY vacuum chamber to make sure I have crystal-clear Epoxy resin.
Once cured I like to sand the back to give a cloudy backing that highlights the bright melted crayon colors.
You can then fit a clock timepiece into the resin clock. You can get these from places like Amazon or Temu relatively cheaply.
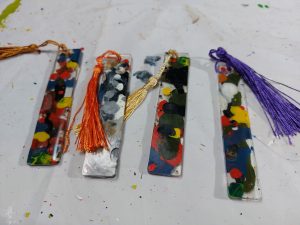
PROJECT 3: Bookmarks
The third Crayon and epoxy resin project is to make bookmarks. I used my silicone bookmark mold to drip melted crayon into the mold and once I was happy with the colors I added the resin.
This is a simple project that you can complete in 10 minutes, although you have to wait overnight for the resin to cure. Once cured remove the bookmark from the mold and add a tassel to give it that extra touch.
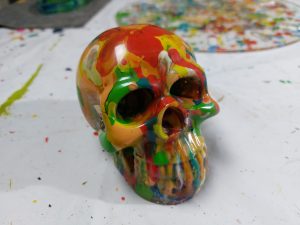
PROJECT 4: Resin Skull
The previous project looked at dripping crayon on top of a skull I had made from Resin using a silicone skull mold. In this project, you drip crayons into a silicone mold. While it is still liquid, move it around the skull mold so that it runs down the mold. Only the first layer of crayon will be seen. Keep repeating until you have the inside of the mold all covered in different crayon colors.
It would be best if you used casting Resin, as this is a deep mold. Casting Resin normally takes about 2 days to cure.
It’s worth the wait, however, just look at the stunning colors and the result we have got!
This is one of my favorite skull projects so far!
In this article, we explored four simple and creative projects that combine crayons and resin to create unique and beautiful art pieces. I showed you how to drip excess crayons onto an object, use a silicone mold of a clock, and make bookmarks using melted crayons and resin.
I hope you enjoyed these projects and that they inspire you to create your own unique crayon and epoxy resin art. If you have any questions or comments, please feel free to jump over to the YouTube video and leave them in the comments section. Thank you for reading this blog post, untill next time keep creative.