


Introduction
Hey there and welcome to Andy’s art lab! Today, I’m excited to share my journey with you as I tackled the challenge of getting resin to adhere to a glass vase. This marks my third attempt, and I can’t wait to tell you all about it. So, grab a seat, and let’s dive into my resin adventure.
Learning from My Mistakes
I must admit, my first two attempts at resin pouring on glass vases were total failures. But, hey, that’s how we learn, right?
Each of the below attempts takes you through what I learned and there may be some resin-pouring nuggets hidden in them so set aside a few minutes and take some time to watch attempts 1 and 2.
I realized that the key to success lies in understanding the type of resin to use and the patience to let it do its magic.
For all three attempts, I used the same glass vase, which I prepared by sanding it, cleaning with isopropyl alcohol, and ensuring there was no dust left.
Attempt 3: The Game Changers
Once you have seen what I did wrong, now it’s time to work out what I did right 😊 For this third resin pour, I made two significant changes that turned the tide in my favor. The first was switching to a faster-curing resin with a cure time of around six hours and a work time of approximately 20 minutes. The second crucial change was my patience. Instead of rushing to pour the resin onto the glass vase, I waited for it to begin reacting and warming up. I really do think this is the magic sauce for getting the resin to stick to the glass. When it’s reacting, the resin gets thicker and slower to flow down the glass vase.
Resin’s curing rate can be affected by the amount of pigment in the mix. The addition of pigment paste extended the working time to about 35 minutes. It was a long wait and I thought I had done something wrong with the mixing of the resin and the hardener since it wasn’t reacting and warming after the 20-minute mark. I had to hold back my impatience to just pour it. Waiting for the resin to reach a stage where it began curing and thickening up was my strategy to ensure it stayed in place and adhered to the glass.
The Resin Pouring Process
I wanted to ensure an even spread of color across the glass vase, so I carefully added layers of resin. The video of the 3rd attempt is down below. When you watch it you can see I fast-forwarded so to save the viewer a bit of time, it might seem like the resin was flowing quickly, but in real-time, it was a slow drip.
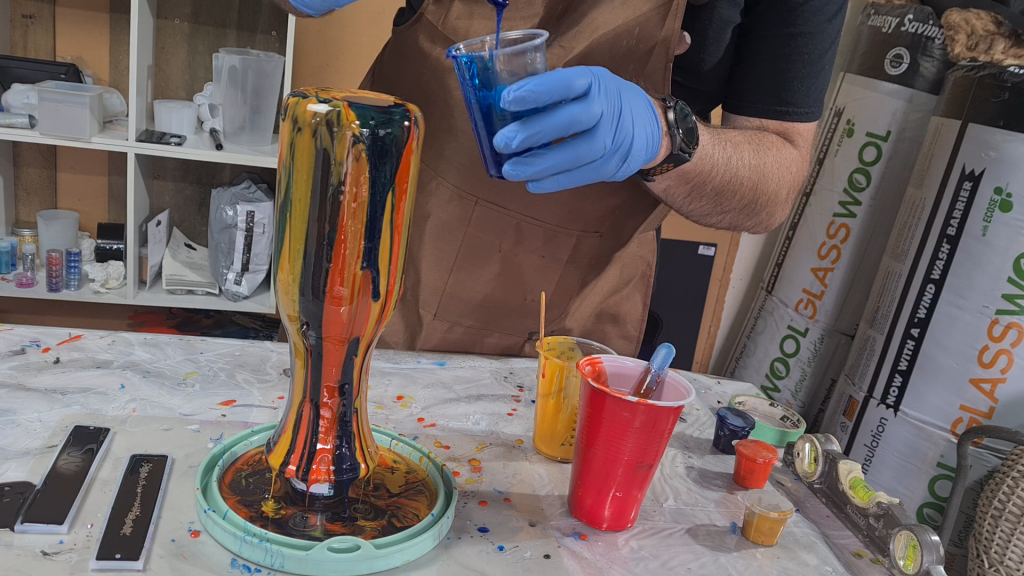
As the resin began to cure and thicken, it was less likely to run off the vase. I did have to use my silicon stirring stick to help the resin get to parts of the glass vase that it hadn’t managed to flow. There were a lot of nerves and my worry was still there that even though at this stage it looked great the previous two attempts also looked great at this stage, however as it cured all the resin dripped off the previous two attempts into the catch tray below. This time however after an overnight cure the resin stayed. Yay!!
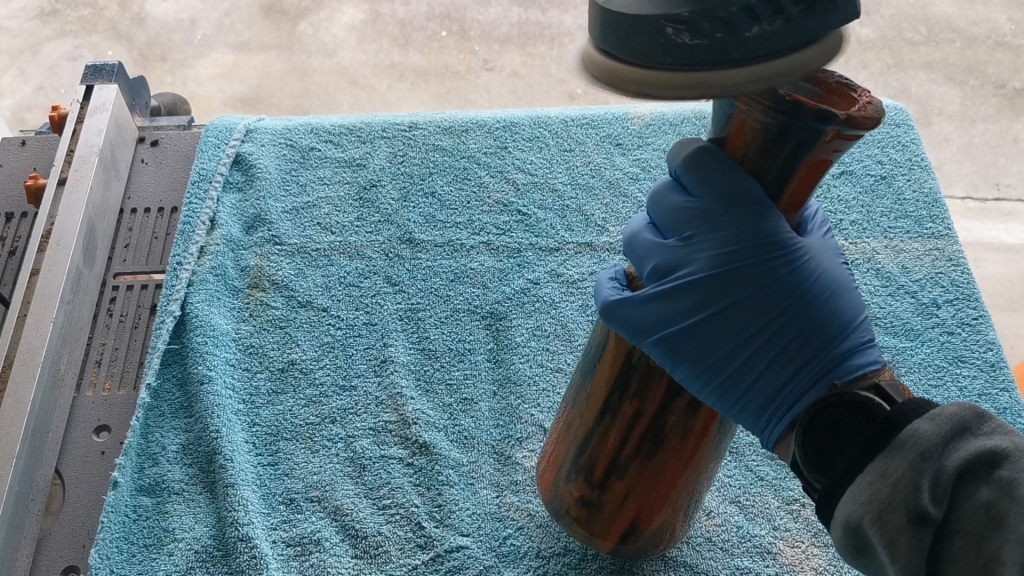
Dealing with Resin Drips
One of the decisions to make when working with glass vases is whether to keep or remove resin drips. I decided to eliminate them this time. Sanding them down to a consistent level was done with the help of an orbital sander and an 80-grit paper. It didn’t take long to get the drips to a satisfactory level. If you’re interested in preventing or dealing with resin drips when doing resin artwork then you can check out my video on the topic.
The Finishing Touch
After taking care of the drips, I cleaned up any sanding residue and applied a dome layer of UV resin around the vase’s edge to give it a beautiful finish. The beauty of UV resin is that it cures rapidly under UV light.
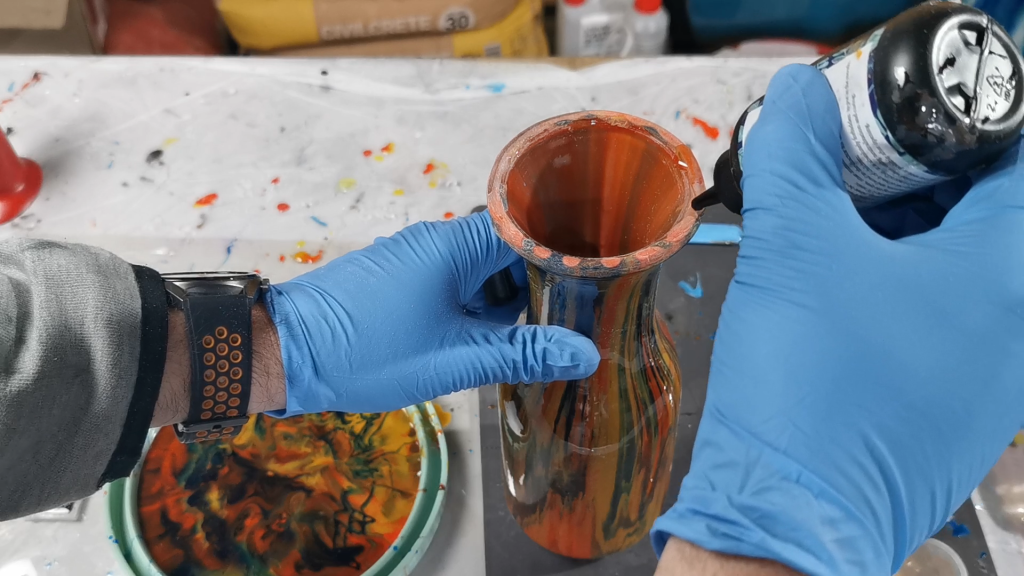
If you don’t yet have any UV Resin it’s a great tool to have in a resin artist’s tool kit. You can pick some up along with a UV light from Lets Resin. If you use the code ‘Andy10‘ at checkout you can get 10% off your order.

A Bonus Surprise
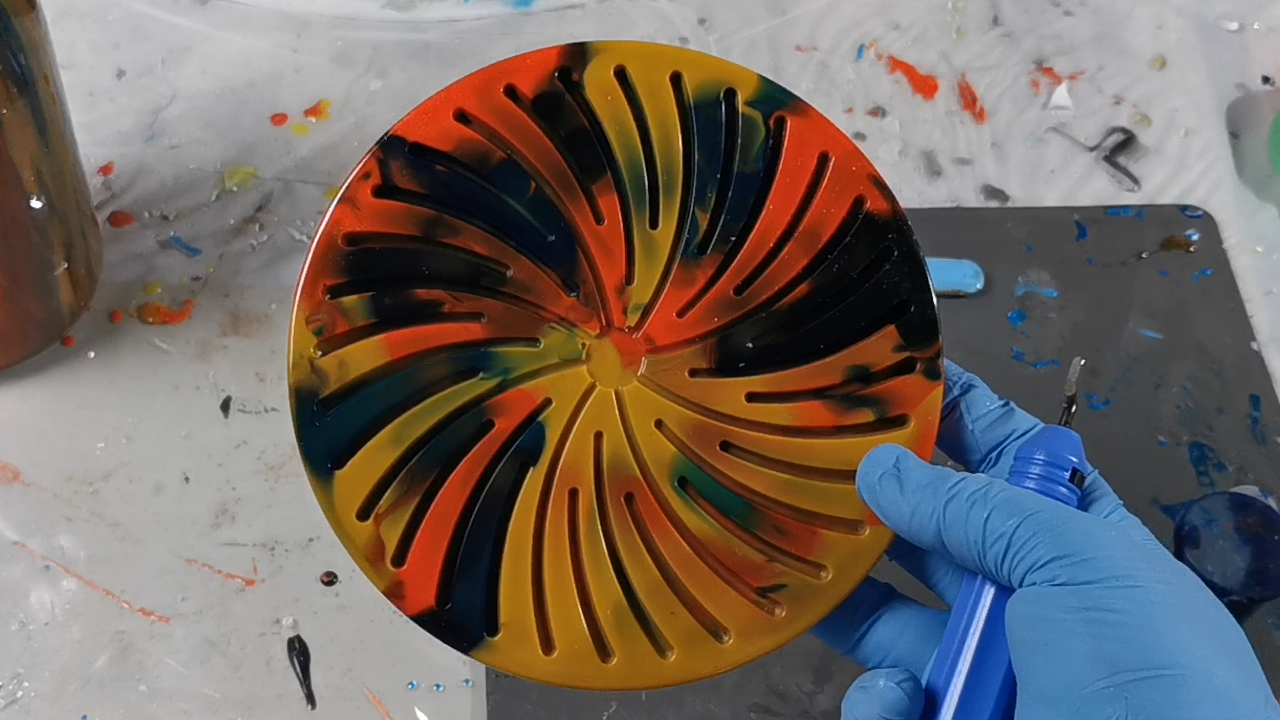
One of the delights of an upside-down vase pour is the extra resin that drips off the bottle into a mold. In my case, I used a silicon mold design to put hot pots on, and it turned out wonderfully.
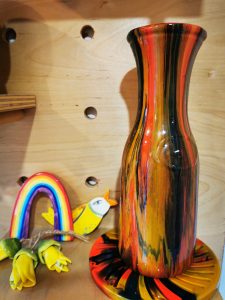
The Big Reveal
And now, the moment we’ve all been waiting for—the grand reveal of the finished glass vase where the resin has successfully adhered. I’m thrilled to say that the third time was indeed the charm. The results are nothing short of stunning.
Thanks for joining me on this resin-pouring journey! If you found this information of value then head across to YouTube and subscribe to my channel. While you are there can you please give this video a thumbs up, and take a look at my other resin art videos. You can also join my newsletter and get yourself a free Resin for Beginners guide by signing up below.
Until next time, keep getting creative, and we’ll catch you in the art lab!