


If you love creating things with Resin like I do then you probably have on your list of things you want to do is creating one or many customized tumblers. No one wants to turn tumblers by hand and the pre-built tumbler turners are expensive. In this article and the YouTube video I created to go along with this, I will guide you through the process of building your very own DIY tumbler turner using pine wood, a cheap motor, and a lamp cord. With a motor and lamp cord, you can automate the turning process, making pouring colored resin or alcohol inks onto a tumble or vase a more efficient and enjoyable crafting experience.
Materials Needed:
1. Wood:
140mm x 18mm length of pine (5.5 inches x 7/10)
– Two pieces for the ends: 140mm x 140mm (5.5 inches x 5.5 inches)
– Base: 150mm x 140mm (5.9 inches x 5.5 inches)
Dowel: 25mm (1 inch) diameter @ 450mm long (17.7 inches)
2. Motor 5-6 RPM Clockwise/Counter Clockwise
3. Lamp cord or similar power cord with an on/off switch
4. Wood screws 60mm (2.36 inches)
5. Drill and spade bit or hole saw – 28mm to 30mm (1.10 to 1.18 inches)
6. Saw (Hand or powered skill or mitre saw)
8. Sandpaper
9. Wire cutter/stripper
10. Pliers
11. Terminal connection
12. Screwdriver
Step-by-Step Guide:
1. Preparation:
Gather all the materials and tools listed above. Ensure you have enough space to work comfortably and safely.
2. Cutting the Wood:
Using a saw, cut the pine wood pieces according to the measurements provided. Sand the edges and surfaces to ensure a smooth finish.
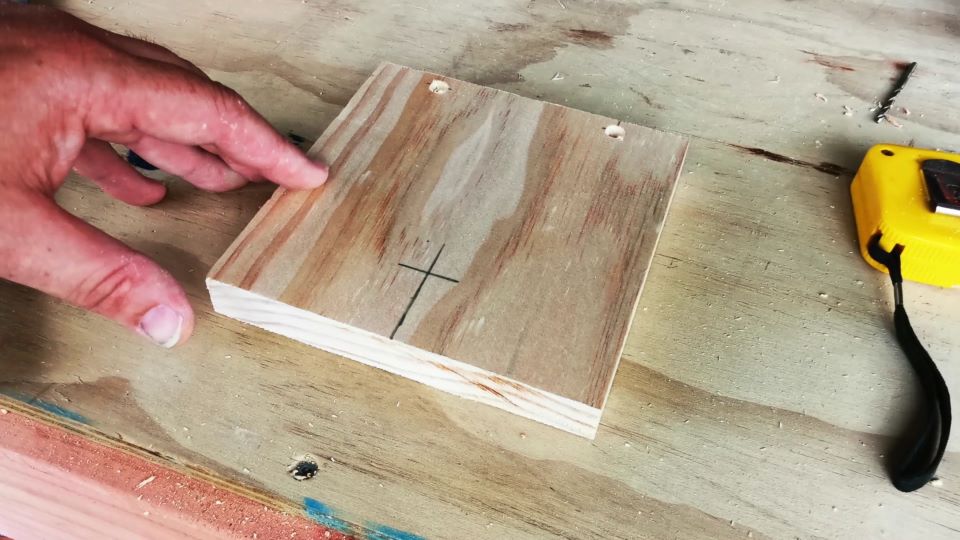
3. Measure the holes.
Measure and mark where you will drill to attach the two end plates to the base as well as the holes for the motor and dowel.
Mark the end board 25mm in from each end and half the thickness of the wood. In my case, the wood is 18mm thick so the holes are marked at 25mm in from the edge and 9mm high.
Mark the holes for the motor and the dowel. In my case that was half the width of the wood, so at 70mm and then down from the top at 30mm
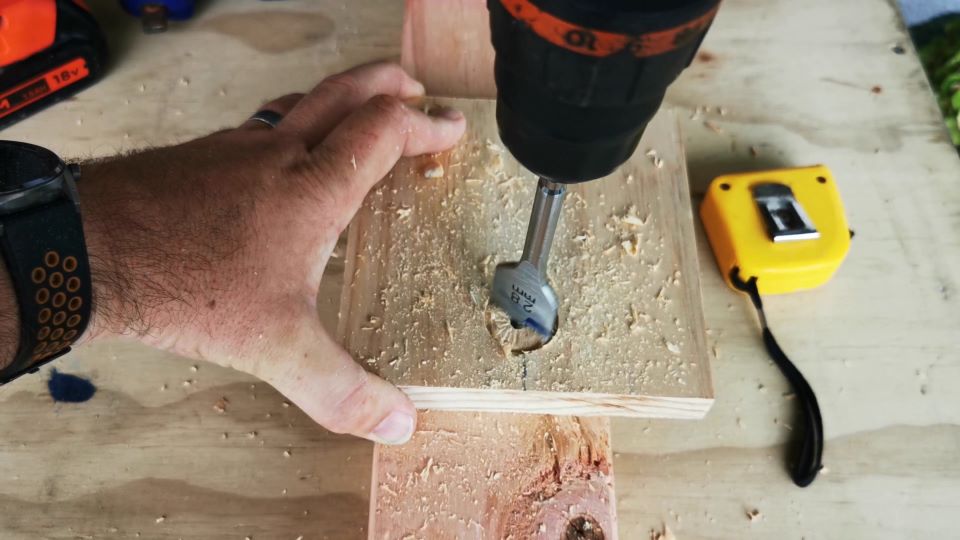
4. Drilling the holes:
With your drill and a 3mm drill bit drill through the wood where you have marked for the screws.
With the spade drill bit or hole saw drill the 28mm to 30mm holes in the two pieces of wood.
Find the center of the dowel and drill a hole approximately 15mm deep using a drill bit that is slightly smaller than the motor shaft. I used a 6mm drill bit for my dowel.
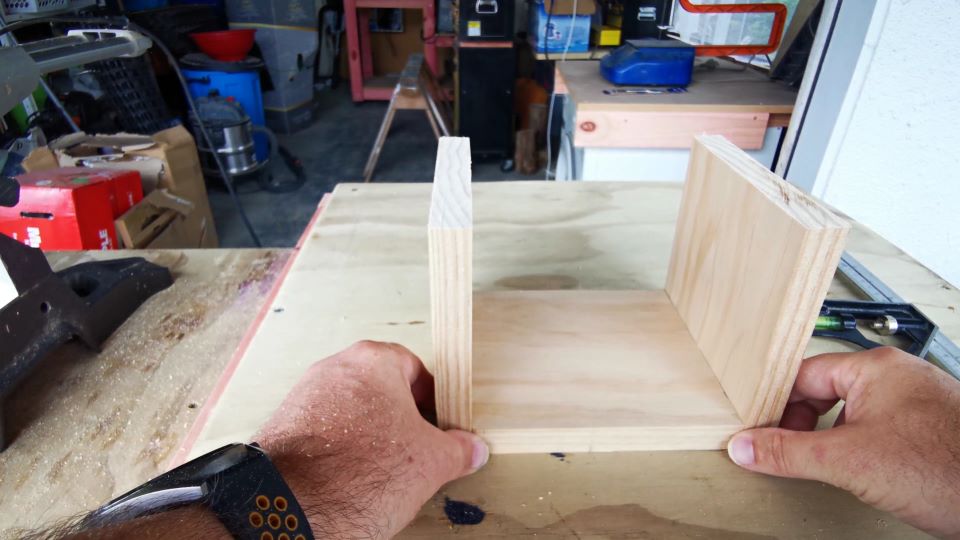
5. Assembling the Base:
Place one of the 140mm x 140mm pieces vertically at each end of the base (150mm x 140mm). These will serve as the support for the dowel.
As an option, you can apply wood glue along the edges where the pieces meet and secure them with wood screws. Allow the glue to dry completely.
6. Installing the Dowel:
Push the motor shaft into the dowel, it should be a snug fit. If you would like you could add some wood glue to bond the dowel and the motor but I did not find it necessary for my construction.
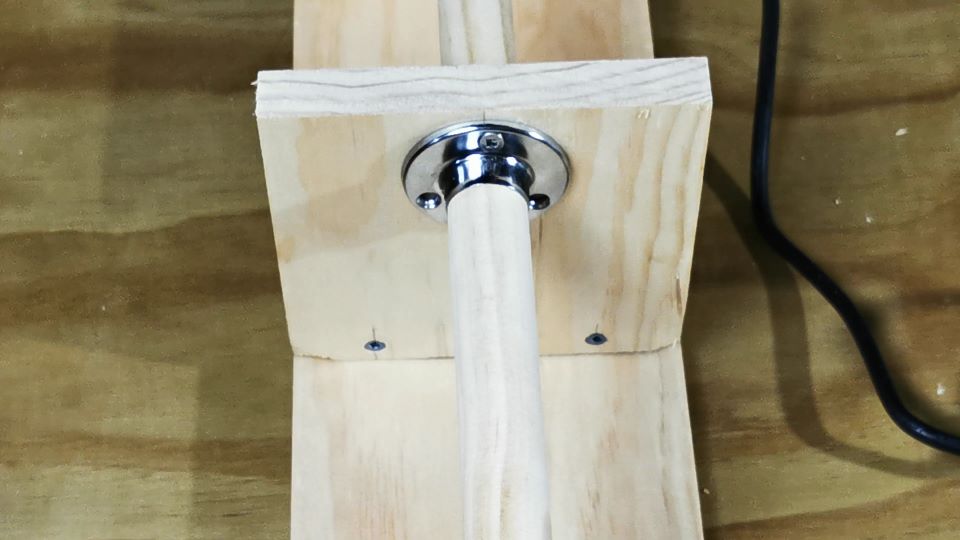
7. Attaching the Motor:
Position the motor with the dowel through the two holes but not touching the outsides of the holes. Mark and screw the motor to the wood. I used some self-tapping screws so the wood did not require being drilled.
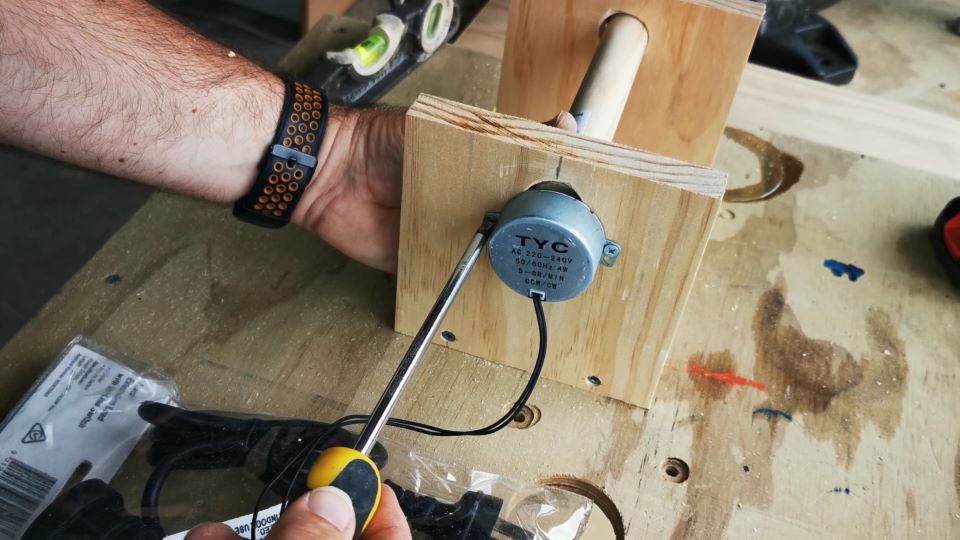
8. Wiring the Motor:
Cut the lamp cord to the desired length, ensuring it can reach a power source comfortably.
Strip the insulation from the ends of the wires using wire cutters/strippers.
Connect one wire from the lamp cord to the positive terminal of the motor and the other wire to the negative terminal. I used a terminal block to connect the wires.
WARNING electricity is dangerous so please ensure you get a professional to wire this connection for you.
9. Testing:
Before finalizing the assembly, plug in the lap cord and test the motor to ensure it rotates smoothly and the tumbler turner functions as expected.
My tumbler motor works with alternative rotation each time you turn it on/off.
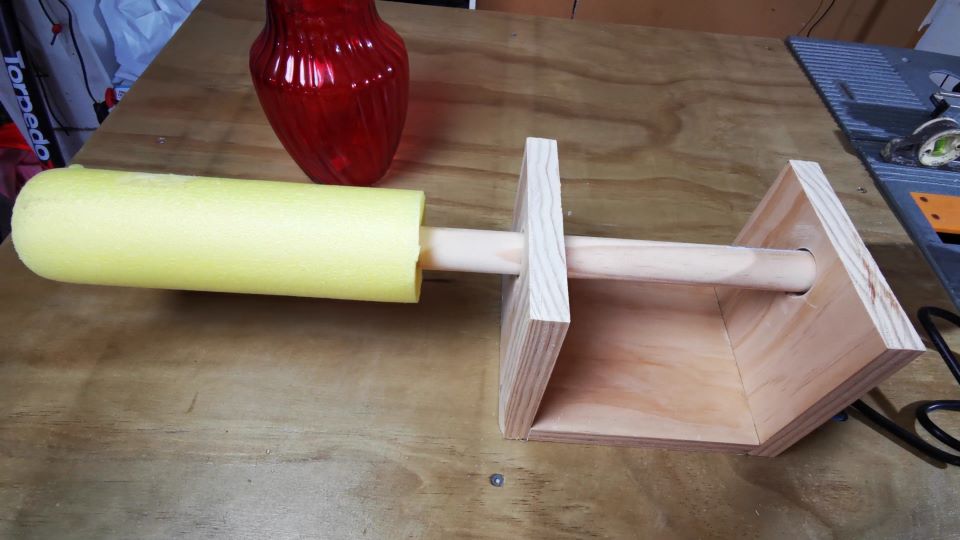
10. Final Assembly:
Depending on the project you will be doing you will need to determine what sponge material to put over the wooden dowel to hold your tumble or vase. Since I had a pool noodle on hand I used that.
You may want to use a sponge football as another method of securing your tumble/vase.
Double-check all connections and ensure everything is securely in place.
Congratulations! You have successfully built your DIY tumbler turner Now you can enjoy the convenience of automated tumbling while crafting your custom tumblers.
Post-Build Improvements:
Since the original build, I found a couple of tweaks to the design that made it slightly better. The first was to have a longer piece of wood on the bottom to act as a counter balance. When I put a heavy glass vase onto the tumbler turner it was too heavy and I had to clamp the turner to my workbench to stop it from falling over due to the weight of the vase.
The second improvement was the addition of a cover across the dowel that allowed me to position it a little higher in the original dowel hole and ensure that it was level for a better resin outcome.
Conclusion:
Creating your own tumbler turner not only enhances your crafting experience but also allows you to customize it according to your preferences and needs. With basic woodworking skills and the right materials, you can enjoy the benefits of automation in your crafting projects. So, gather your supplies, follow the steps outlined above, and embark on your journey to efficient tumbler crafting!