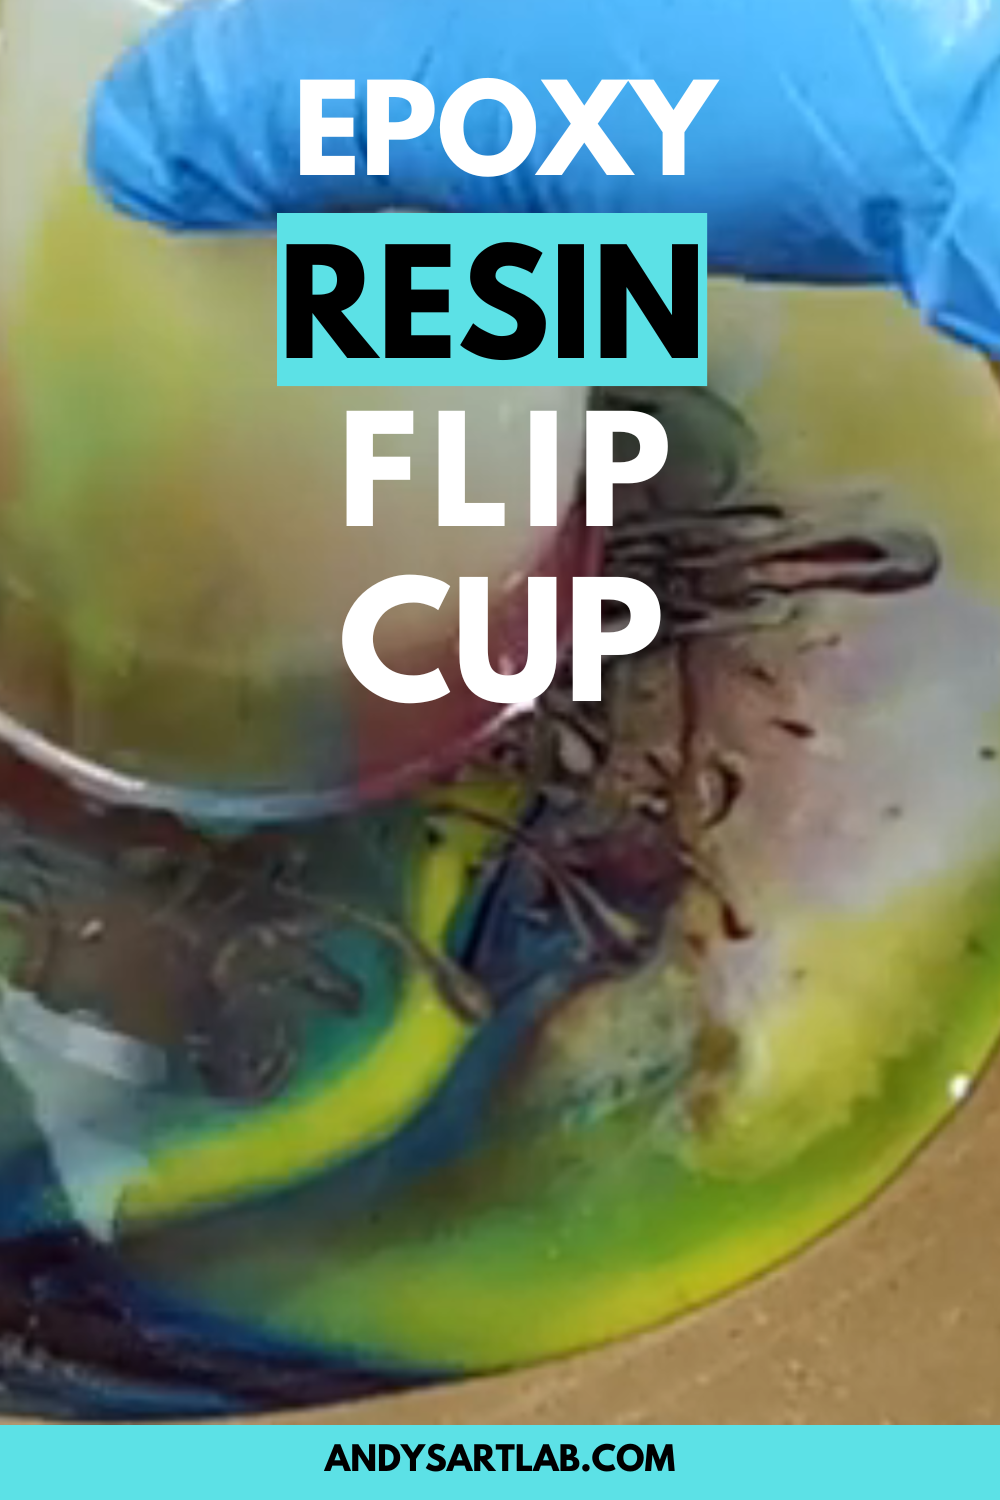


In this blog post, we’re going to be having some fun with resin. We’ll be doing a dirty pour onto an MDF art board and creating some fantastic resin art for your wall.
Welcome to the Art Lab, my name is Andy and I create Resin art and Crafts. Take a look at my other blog posts when you get a chance, and of course, check out my YouTube channel where I make weekly videos like the one below.
Table of Contents
Leveling the Artwork ready for the Dirty Pour
The first thing we need to do is level the artwork to make sure that when we put the resin on it, it runs off evenly. To do this, we can use a spirit level. Place the level on the art board and adjust what it is sitting on until the bubble is centered. I use plastic cups turned upside down or I have 3D printed some artstands that I use. I add bits of cardboard to increase the height to make the board level. Once the art board is level, we can move on to the next step where we mix the resin.

Working with Resin
Creating artwork with resin is an exciting and versatile medium that allows artists to bring their visions to life. However, it is crucial to make sure you do it safely when working with resin due to the potential hazards it presents. See my full Safety Guide here
- Airflow’s Key: Work in a spot with good airflow to keep those fumes away from your lungs. Wear a proper mask to keep your lungs safe.
- Gear Up: Gloves, goggles, and long sleeves are your best bet. Protect your skin and eyes from any splashes or fumes.
- Read the Rules: Follow the instructions on the resin bottle closely. Get the mix right and let it cure for the time they say. You don’t want any surprises, right?
- Skin’s Not a Fan: Resin isn’t friendly to your skin. Avoid touching it for too long, and if it does get on you, wash it off ASAP with soap and water.
- Heat with Care: If you’re using heat to get rid of bubbles, go easy on it. You don’t want to burn the resin or set it on fire. Keep your heat source moving and don’t let it get too close.
- Fire Safety 101: Remember, resin and its fumes can catch fire, so keep it away from open flames, sparks, or any heat source that could set it off.
- Clean Up: When it’s time to clean up, use the right solvents or cleaners that the manufacturer recommends. And don’t forget to get rid of the waste properly, following the rules in your area.
Basically, by following these tips, you can create some awesome resin art without putting your health at risk. Now on with the dirty pour!
Applying a Seal Coat
The next step is to apply a seal coat to the MDF art board. This will help the next lot of resin that we put on to run a lot easier and not have to soak into the wood. To apply the seal coat, we can use a plastic spreader. I 3D printed one, but you can pick them up easily from your local hardware store. Make sure to apply the seal coat in a thin, even coat.

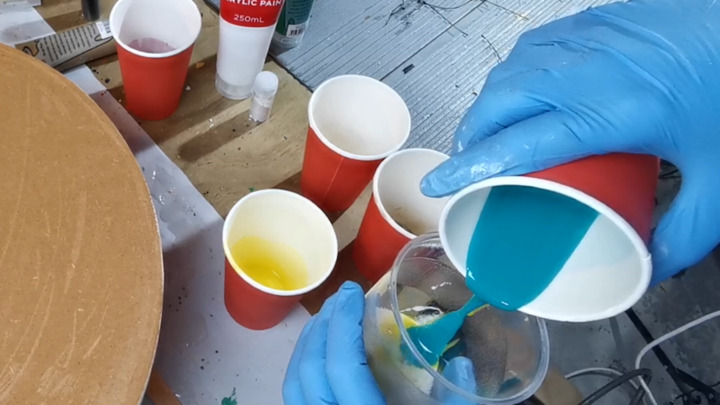
Making the Pouring Cup
It’s time now to make the pouring cup for our dirty pour. To do this, we’re going to start adding in the various colors one on top of each other. We can use any colors we like, but it’s important that the colors you add are NOT complementary to try to avoid making browns/grays when they mix.
When selecting colors to mix, it is important to consider the color wheel. The color wheel is a circular diagram that shows the relationships between different colors. Colors that are opposite each other on the color wheel are called complementary colors.
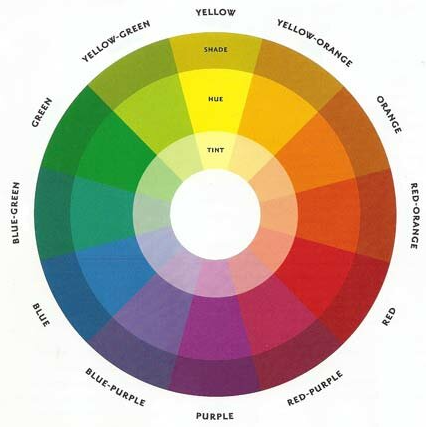
When mixed, complementary colors create a neutral gray or brown. For example, red and green are complementary colors, and when mixed, they create a brownish-gray.
To avoid creating browns or grays when mixing colors, it is important to choose colors that are not complementary. Instead, choose colors that are adjacent to each other on the color wheel. For example, blue and green are adjacent colors, and when mixed, they create a teal or turquoise color. Yellow and orange are also adjacent colors, and when mixed, they create a golden-yellow color.
By choosing colors that are not complementary, you can create a variety of beautiful and vibrant colors when mixing.
Pouring
Once we’ve got all the colors into the one cup, we’re going to do a flip cup dirty pour. The main difference between a dirty pour and a flip cup dirty pour for resin is the way the colors are mixed. In a dirty pour, the colors are poured directly onto the canvas or surface in layers, while in a flip cup dirty pour, the colors are mixed together in a cup and then poured onto the surface.
Dirty pour:
- Colors are poured directly onto the cup and then onto the surface
- Colors are more likely to stay separate
- Creates a more organic, fluid look
Flip cup dirty pour:
- Colors are mixed together in a cup, the cup flipped upside down then released onto the surface
- Colors can mix together as they are poured
- Creates a more defined, geometric look
Ultimately, the best technique for you will depend on the look you are trying to achieve. If you are looking for a more organic, fluid look, then a dirty pour is a good option. If you are looking for a more defined, geometric look, then a flip cup dirty pour is a better choice.
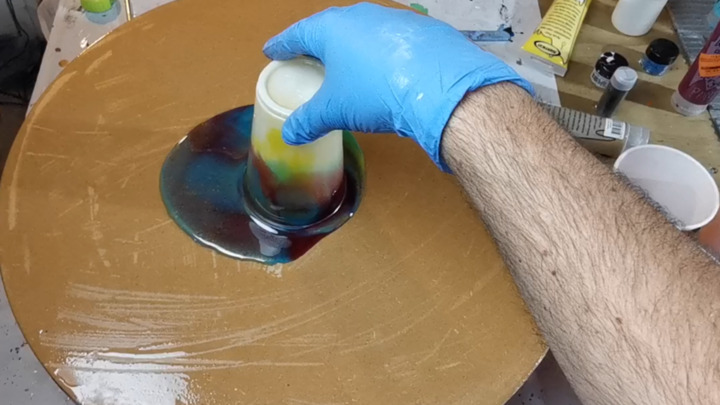
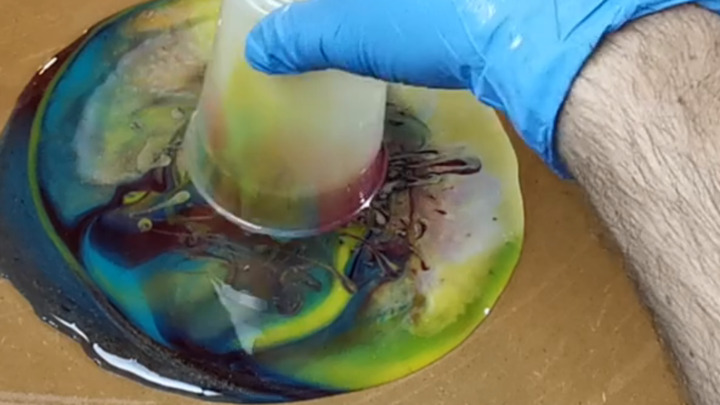
To do the flip cup method we’re going to flip the cup upside down and let it sit for 30 seconds or so for the resin to run. Then, we’ll lift the cup up and let the resin run out onto the art board.
The resin will naturally flow outwards across the board but it may need some intervention to help cover the whole board. We can do this by tilting the board around allowing the resin to run to the edges.
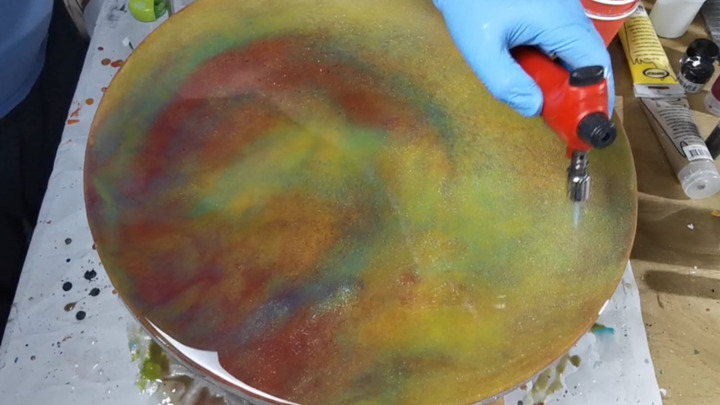
Popping Bubbles
Once the resin is spread out, we need to pop any bubbles that may have formed. We can do this with a heat gun or by using a chef’s gas torch. These tools produce heat that helps the trapped air bubbles rise to the surface and pop.
Hold the heat gun or torch a few inches away from the resin surface and move it in a sweeping motion across the area. Avoid holding the heat source too close or in one spot for too long, as this can cause overheating or even scorching of the resin.
As you apply heat, you’ll notice the bubbles disappearing and the surface becoming smoother. Continue this process until you are satisfied with the bubble-free appearance.
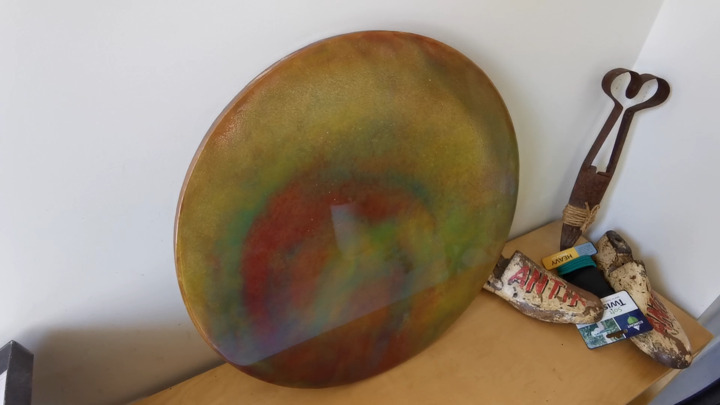
Curing the Resin
Once the bubbles have been popped, we need to let the resin cure. The curing time will vary depending on the type of resin you’re using. Consult the manufacturer’s instructions for specific curing times. The resin I use takes about 14 or so hours, but it can take longer during colder months.
Finishing the Artwork
Once the resin is cured, we can finish the artwork by sanding the back of it if you were too lazy to tape it up or remove the tape that caught the resin drips. You can check out this video here if you want to see how you can use painters tape to prevent the need to sand.
Tips and Troubleshooting
If you’re having any problems with your dirty pour, here are a few troubleshooting tips:
- The resin is too thick. If the resin is too thick, it will be difficult to spread and may not flow evenly. You can heat the resin bottle in a warm water bath (put the bottle in the sink)
- The resin is too thin. If the resin is too thin, it will run off the art board too quickly and may not create the desired effect. You can add tape around the edge of the board and remove it once the resin has cured a little. See this video here where I use this technique.
- There are too many bubbles. If there are too many bubbles in the resin, it will create a cloudy or uneven finish. You can pop the bubbles by using a heat gun or gas torch.
- The resin is not curing properly. If the resin is not curing properly, it may be because the curing time was not long enough or the temperature was too low. Consult the manufacturer’s instructions for specific curing times and temperatures.
Conclusion
Dirty pour resin art is a fun and easy way to create beautiful and unique artwork. With a little bit of practice, you can create amazing pieces of art that you can be proud of.
I hope you found this article helpful. If you have any comments or questions please head over to the Dirty Pour video on YouTube and put it in the videos comments section. If you are not a subscriber already then please consider becoming one so you can see the weekly content I make 🙂
Thanks for joining me in the Art Lab!
Cheers
Andy