


A Step-by-Step Guide
Are you looking for a new creative project to try? How about making your own wind chimes using wood and resin? This project offers a wonderful way to combine different materials into a beautiful and functional piece of art. Embarking on a creative project such as crafting your own wind chimes using wood and resin can be a fulfilling and rewarding experience.
This project is a perfect fit for both beginners and seasoned crafters, as it offers a manageable level of challenge while allowing room for personal creativity.
Table of Contents
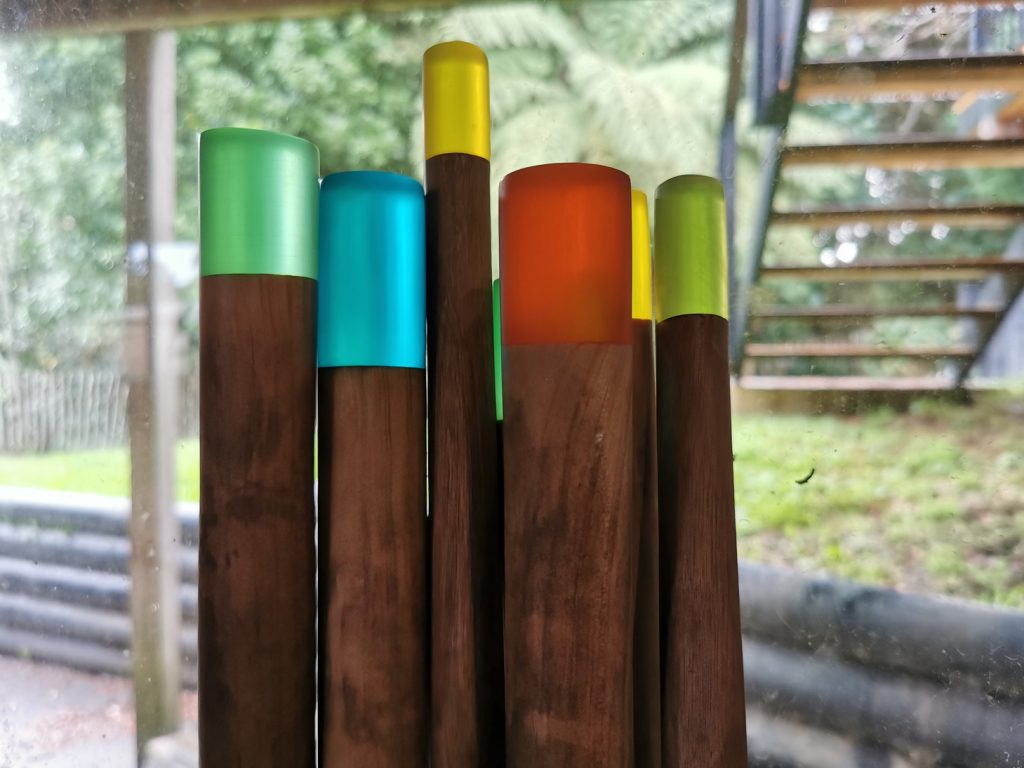
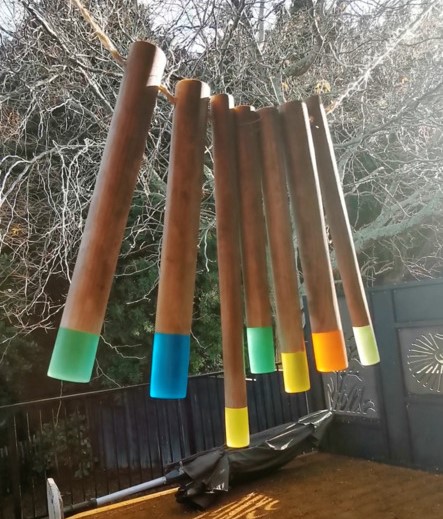
The combination of wood and resin in this project creates a striking visual effect. The natural grain patterns of the wood blend harmoniously with the vibrant, translucent properties of the resin, resulting in a unique and eye-catching piece. This makes a great wall hanging to brighten up and decorate any home.
The process involves cutting and shaping wooden pieces into desired shapes, such as cylinders in this example, or you could use the same technique to make these squares, or rectangles. These wooden pieces are then wrapped in plastic to make a mold, where the resin is poured and allowed to cure. The curing process typically takes several hours or days, depending on the thickness of the resin. Once the resin has fully hardened, the wind chimes are ready to be sanded, finished, assembled and hung.
This project provides ample opportunities for customization. You can experiment with different wood species, resin colors, and decorative elements to create wind chimes that reflect your personal style. By incorporating found objects like sea shells, pebbles, or dried flowers into the resin, you can add a touch of whimsy and uniqueness to your chimes if you want to.
Moreover, crafting your own wind chimes is a mindful and therapeutic activity. The repetitive motions of cutting, sanding, and pouring the resin can be calming and meditative. The creative process itself allows you to express yourself while learning new skills.
Whether you’re looking for a new hobby, a way to add a touch of beauty to your indoor or outdoor space, or a thoughtful gift for a loved one, making your own wind chimes using wood and resin is a fantastic choice.
Let’s dive into the steps and some tips to help you along the way!
Materials Needed
- Wooden dowels
- Resin
- Drill with a Forstner bit
- Clear plastic folder sleeves or similar plastic
- Tape
- Alcohol ink (for tinting resin)
- Sandpaper (various grits: 60, 80, 120, 240, 320, 600, 1200)
- Belt sander and orbital sander (optional)
- Masking tape
- Oil-based stain
- Automotive polish
- String
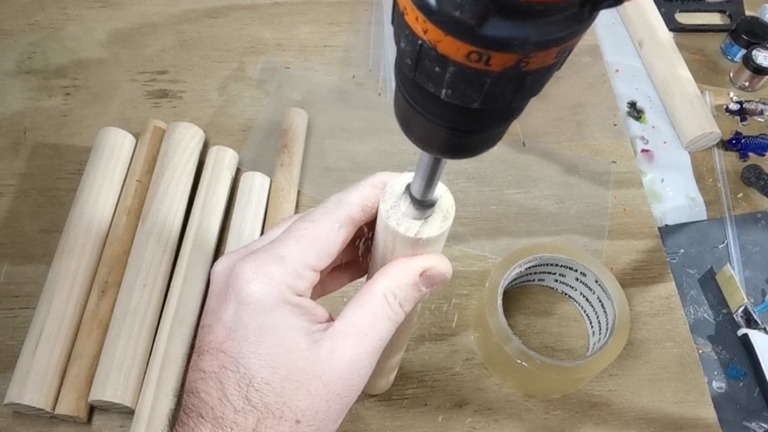
Step 1: Preparing the Wooden Dowels
To start, take your wooden dowels and use a drill with a Forstner bit to make small indentations. These indentations will help the resin to adhere more securely to the wood, ensuring a strong bond. You need this strong bond otherwise the resin could just snap off when putting pressure on it while sanding.
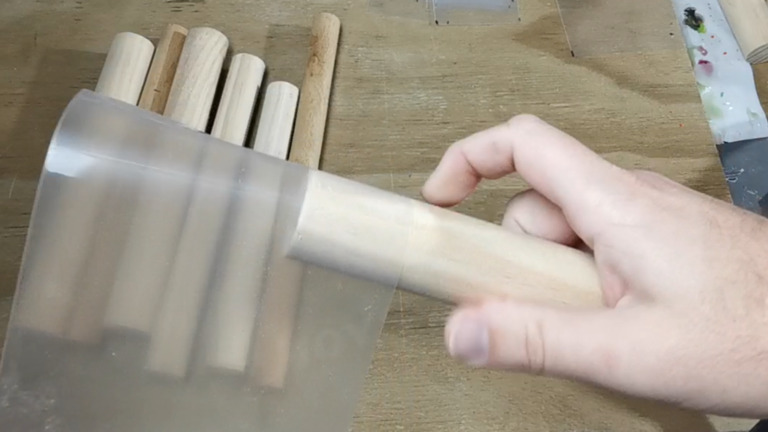
Step 2: Create a Mold for the Resin
Instead of using traditional flat molds, we will use clear plastic. I found it difficult finding sheets of plastic so in the end I used office folder sleeves that were the right flexibility and thickness. Wrap the plastic tightly around the dowels and secure it with tape. This makeshift mold will hold the resin in place and prevent it from running down the wood. Be sure to wrap it tightly to minimize seepage. You will likely get some color staining where the resin meets the wood but this should come off when we get to the sanding step.
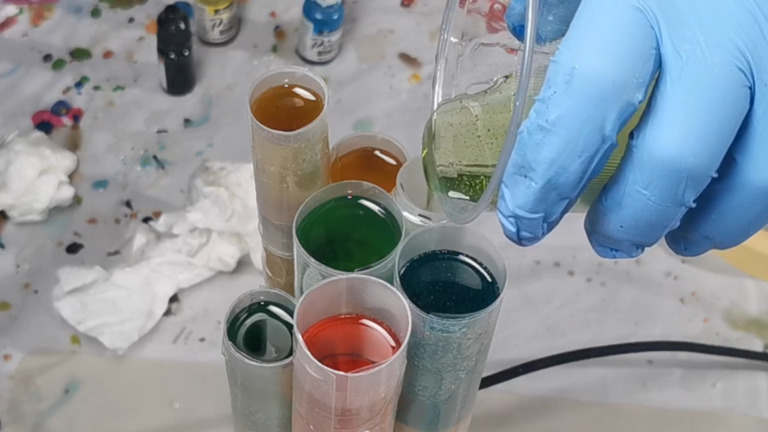
Step 3: Mixing and Pouring the Resin
Mix your resin according to the manufacturer’s instructions. To add a touch of color, mix in a small amount of alcohol ink. Alcohol ink tints the resin without making it opaque, giving it a beautiful translucent effect.
Carefully pour the resin into the molds you created. Try to pour directly into the center to avoid spills. If you do spill, clean it up immediately to prevent staining and hardening.
Step 4: Curing the Resin
Allow the resin to cure for the recommended time, which is usually around 48 hours if you use a deep-pour resin. I would recommend for this project due to the volume of the resin used to use a deep pour resin. Be patient and ensure it cures completely to achieve the best results.
Step 5: Removing the Plastic Mold
Once the resin has cured, carefully remove the plastic. You may find that some resin has stained the wood, which is normal. This will be taken care of in the next steps with your trusty sander.
Step 6: Sanding the Resin
Oh boy I hate sanding! The dust goes and gets everywhere. Its important when sanding resin and wood that you wear a good quality mask and filters as the last place you want those small dust particles is in your lungs.
Sanding is a crucial step to get a smooth finish. Start with coarse grit sandpaper (60 grit) to remove any major imperfections. Gradually move to finer grits (80, 120, 240, 320) using a belt sander or orbital sander if available. Finish with hand sanding using 600 and 1200-grit sandpapers. You can go higher grit than this if you want to get a clearer finish on your resin. Adding a bit of water or dishwashing liquid can help make this process easier once you are sanding from 600 and above.

Step 7: Staining the Wood
Before staining the wood, drill holes at the ends of each dowel and give them a light sand so they look smooth.
To enhance the appearance of the wooden dowels, apply an oil or wood-based stain. First, use masking tape to protect the resin from the stain. Apply the stain evenly and wipe off any excess with a rag. I used a Walnut stain that added depth and brought out the natural grain of the wood.
I also found from trial and error it was easier to put some stain on a rag and wipe it onto the wood, rather than the traditional bruising the stain on and whipping off the excess.
Step 8: Polishing the Resin
After sanding, polish the resin with automotive polish to give it a glossy finish. This step is optional but can make your wind chimes look even more stunning. I don’t have access to a buffer or buffer attachments you can get for your drill so I just used a rag to apply and buff. Using a machine will get you a better result.
Step 9: Assembling the Wind Chimes
Use string to connect the dowels, creating the chime structure. Braiding the string can add a decorative touch and ensure durability if you are that way inclined. I myself channeled my inner Dad skills from braiding my daughter’s hair to creating the braided string.
Step 10: Displaying Your Wind Chimes
Depending on what you want to use your wind chimes for, either something practical or as an art piece you can decide if they become an outside chime or an indoor wall hanging. Wherever you decide to hang your wind chimes you can enjoy the visual and auditory beauty they bring to your space. Even on less sunny days, the tinted resin will catch the light beautifully.
Final Thoughts
Creating resin wind chimes is a fun and rewarding project that allows you to explore the combination of wood and resin. Whether you are a seasoned crafter or a beginner, this project is accessible and offers endless possibilities for customization. If you have any questions or comments about the process or you want to share some you have created, then head across to the Wind Chimes video and share in the comments section.
Thank you for following along! If you enjoyed this guide, please consider subscribing to my You Tube channel and interacting with my videos. Keep creating and happy crafting!
Sharing is caring. If I can ask you a big favor and get you to share/pin the below image to Pinterest I would be grateful.