


Bringing Your FAILED Resin Painting Back to Life
Have you ever created a resin art piece that didn’t quite hit the mark? Maybe it lacked that wow factor or left you feeling a bit meh. Well, I have created a few artworks that fit this criteria in the past 2 years of creating Resin art. Fear not! Today, I’m going to show you how to resurrect a lackluster resin pour painting and turn it into something spectacular.
The Canvas: Why Resin Works Wonders
First things first, let’s talk about our canvas. Resin art pieces are a perfect medium to create alcohol ink artwork because they don’t absorb alcohol ink. That’s right! Unlike traditional paper or canvas, resin provides a slippery surface where we can play with colors and patterns.
If you were to create a new alcohol ink artwork from scratch then I would recommend using an aluminum panel which has similar properties to a surface with a layer of cured resin. So, dust off that old resin piece that hasn’t sold or that you’ve been eyeing skeptically, and let’s give it a makeover.
Tools of the Trade
Before we get started, gather your supplies:
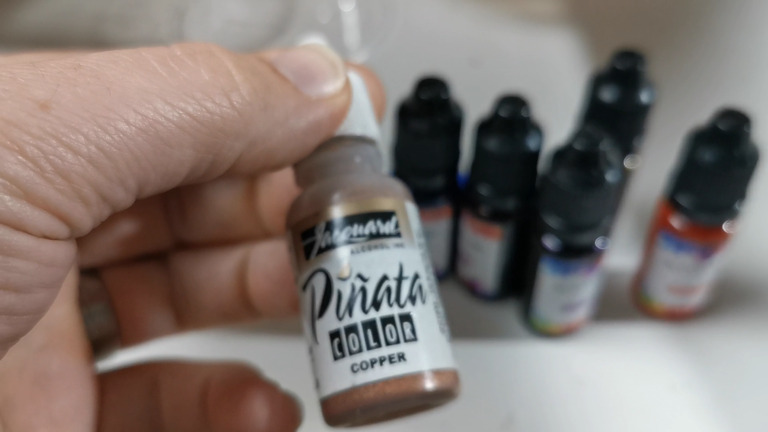
- Alcohol Ink: I’ve used a mix of Temu and Panata inks since that is what I have on hand. These vibrant colors will breathe new life into our artwork. I like to use metallic like gold alcohol ink to highlight areas of the artwork. (See my Temu Alcohol ink review)
- Air Pusher: Forget the hair dryer; it can be too forceful. I purchased a little hand-operated air pusher as my secret weapon for gentle ink movement.
- Isopro Alcohol: This helps blend the ink and adds a touch of magic. You can also use it if you want to start over and wipe off any alcohol ink that you may have already laid down.
Step 1: Level the Playing Field
Make sure your resin piece is level. No wobbles allowed! Use a spirit level to ensure that your resin artwork is level so the alcohol won’t run. Once it’s steady, we’re ready to rock.
Step 2: Applying the Ink
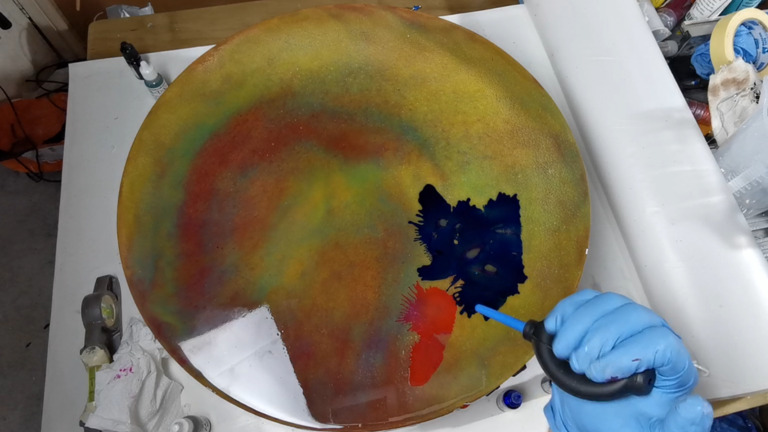
- Start by applying alcohol ink over your artwork. Imagine you’re painting with liquid rainbows. 🌈
- Now, instead of a hair dryer, grab your air pusher. Gently coax the ink around, creating swirls, waves, or whatever floats your creative boat. Remember, this is your masterpiece!
- Add Isopropyl alcohol to areas of alcohol ink that you want to spread further or that you want to thin out. The thinner the layer the lighter the color.
Step 3: The Reveal
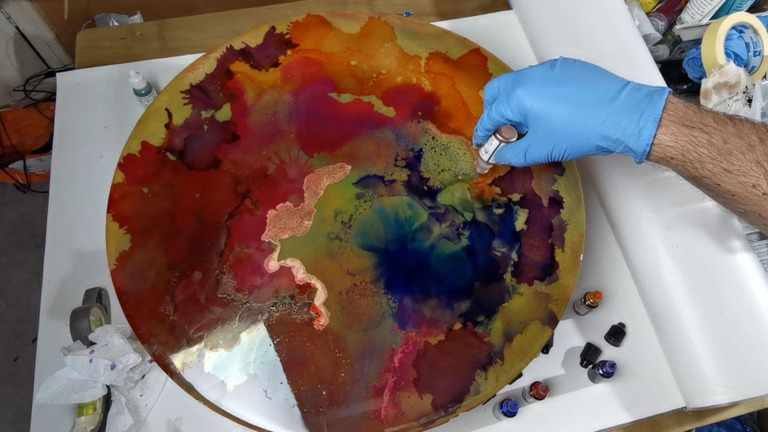
As the alcohol ink dries, you’ll see light and dark patterns starting to form from within that color. You will also get color mixing when you blend adjacent colors. What was once dull now boasts vibrant colors and flair. I like to lay down the metallic accents last. In this case I used copper and gold accents—it’s like our artwork got a sprinkle of stardust. ✨
Step 4: Seal the Deal
Once everything is completely dry then to protect your newfound masterpiece, consider sealing it. You’ve got options:
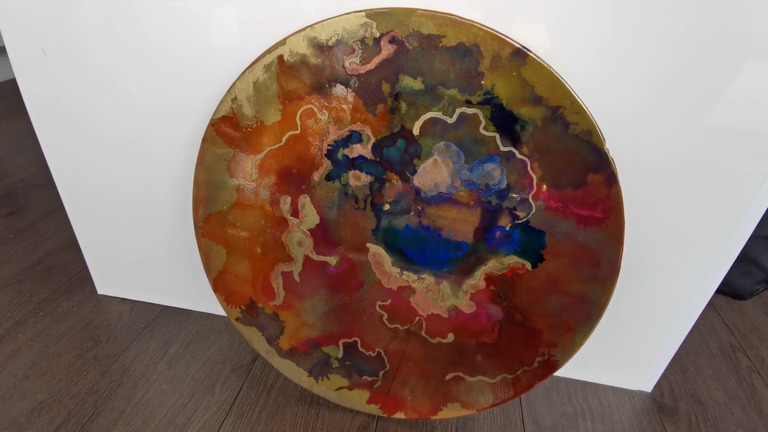
- Clear Resin: If you’re feeling fancy, pour a thin layer of clear resin over your piece. It’ll add depth and shine.
- Acrylic Clear Spray: For a quicker fix, grab some acrylic spray. A few coats, and voilà!
Wrap-Up
And there you have it! Your once-meh resin art piece is now a showstopper. Give yourself a pat on the back—you’re an art magician! 🎨✨
If you enjoyed this tutorial, then head across to the YouTube video and let me know in the comments section what you think or any feedback you may have. If you have any learnings yourself using alcohol ink on top of resin then also feel free to add that to the video comments section.
Until next time, keep creating, my fellow artists! 🙌