Epoxy Resin for Beginners
If you’re new to resin art, you might feel a little overwhelmed by all the materials, techniques, and tools involved. But don’t worry, resin art is so much fun and surprisingly easy once you get the hang of it! At Andy’s Art Lab, I’m here to help guide you through the process of creating beautiful resin pieces using silicone molds. By the end of this guide, you’ll be ready to dive into this creative art form with confidence.
The Simple Steps To Casting Resin In Silicone Molds
What is Resin Art and Crafts?
Resin art is a craft that involves pouring a liquid epoxy resin into molds or onto surfaces, which then hardens into a clear, shiny finish. It’s used to create a wide variety of things like coasters, jewelry, or even unique wall art. The best part is that resin can be mixed with fun extras like glitter, pigments, and small objects for endless creative possibilities! My favorite resin art is when I combine Epoxy Resin with Wood to make a unique creation.
What is Resin Art Made Of?
Most resin projects use epoxy resin, which comes in two parts: the resin itself and a hardener. When mixed together in the right ratio, these components create a chemical reaction that causes the resin to harden. The result is a glossy, durable piece of art. Silicone molds are perfect for shaping resin into various forms because they’re flexible and easy to work with, and are one of a handful of materials that resin will not stick to.
Why is Resin Art So Popular?
Resin art has taken off in popularity because it’s such a versatile medium. You can use it to make everything from jewelry to home décor, and the process feels like a fun science experiment. Plus, you get to play with colors, textures, and designs to create one-of-a-kind items. The finished products are often stunning, with a glass-like finish that makes your artwork pop. Head over to my YouTube channel Andy’s Art Lab to take a look at some of the things I have created with Resin (Hint – Like and subscribe while you are there 😉)
Can Resin Art Be Done in Resin Molds?
Absolutely! Silicone molds are perfect for epoxy resin projects. They come in different shapes and sizes, making it easy to create everything from keychains to paperweights. Because silicone is non-stick, your cured resin will pop right out without too much effort. Now, let’s break down how to use silicone molds with resin, step by step.
Introduction: Getting Started with Epoxy Resin and Silicone Molds
Working with resin for the first time can seem a bit intimidating, but it’s really just about following the steps carefully. The number one step is always safety. Epoxy Resin does require some safety protection gear, so take a look at my Safety Blog before you get started.
Now that safety is covered, here’s a quick and simple guide to get you started on making resin art and crafts using silicone molds.
Step 1: Getting Ready
Before diving in, you want to set up your workspace properly. Make sure it’s well-ventilated, and cover your work surface with newspaper or plastic. Resin can get messy! Don’t forget your gloves to protect your hands and mask for any fumes.
Step 2: Select Your Silicone Mold
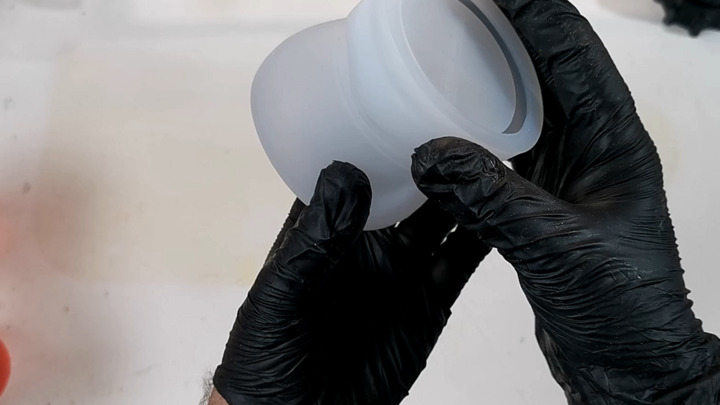
Choosing the right mold is the first step. Silicone molds come in so many shapes, from simple circles to intricate designs. Whether you’re making coasters, pendants, or paperweights, there’s a mold for it! Just make sure it’s clean and dry before you start.
My two favorite places to source Silicone Molds are Amazon and Temu. It may take a little longer for delivery but I have been surprised by the quality of the molds from Temu.
Temu Jar Mold: https://temu.to/k/uw51hlp19dz

Step 3: Do You Need Mold Release?
For some projects, using a mold release spray can help the resin pop out more easily. Spray a light mist over the mold and let it dry for at least 30 minutes before pouring the resin. This isn’t always necessary for silicone molds but can be helpful if you plan on using the same mold multiple times.
Step 4: Mix and Pour Resin
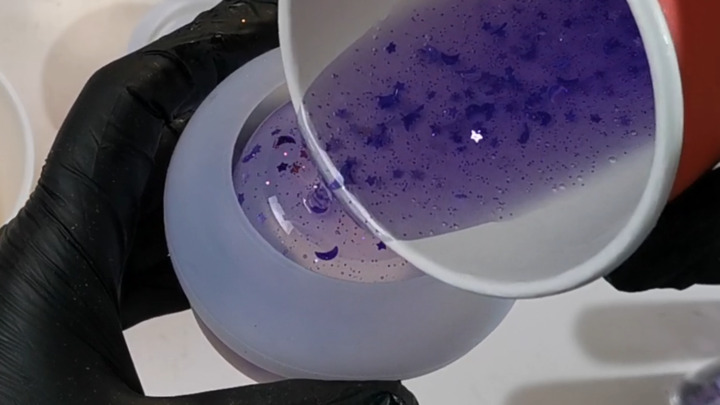
Next, it’s time to mix your resin. Follow the instructions on your resin package closely. Typically, you’ll need to mix the resin and hardener at a 1:1 ratio for art resin and 2:1 ratio for casting resin. Stir slowly with a popsicle stick until the mixture is clear and free of streaks.

Step 5: Add in All the Fun Things!
This is where the fun begins! Add your glitter, dyes, or charms to the resin. Stir them in carefully, making sure everything is evenly distributed. You can get creative here by mixing different colors or adding small objects like flowers or beads.
Step 6: Remove Bubbles
Before your resin cures, you might notice some bubbles on the surface. Don’t worry, this is normal! When using Silicone molds I try to stay away from using a heat gun or open flame, as this can damage the silicone mold. Instead, I use a Bic EZ Lighter as it has a small flame to pop the bubbles, and it’s not too hot to damage the silicone. You can also spray some isopropol alcohol to help pop surface bubbles.
Step 7: Let It Cure
Let your mold sit undisturbed for 24 hours or as directed by the resin manufacturer. If you are using casting resin it can take up to 3 days to cure. This is the hardest part—waiting! But trust me, it’s worth it to get that perfect, glossy finish. Cover your piece with a container to keep dust and pet (and human) hair from settling into the resin while it cures. I once had an eyelash ruin an artwork!
Step 8: Demold the Cured Resin
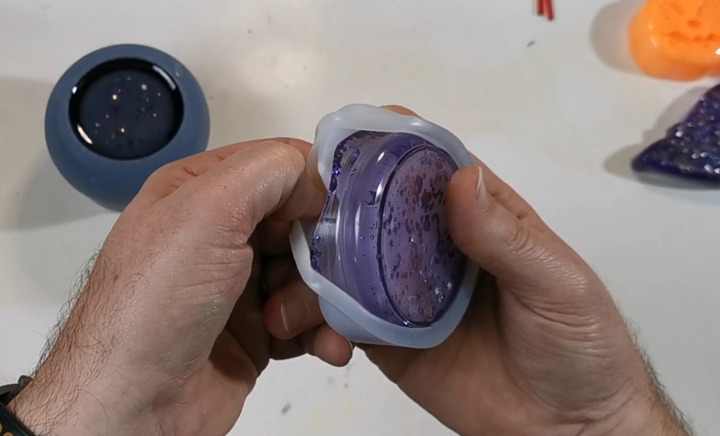
After your resin has fully cured, it’s time to demold. Gently peel the mold away from the edges of the resin. If you’re using a soft silicone mold, be careful not to tear it.

Step 9: Wash Your Mold
Once you’re done, clean your mold with warm, soapy water and let it dry thoroughly. This keeps it in good shape for your next resin adventure!
FAQ: Using Silicone Molds for Resin Art
How Do You Stop Resin from Sticking to Silicone Molds?
Silicone molds are generally non-stick, but using a mold release spray can help make the demolding process even easier, especially if you plan to use the mold multiple times.
Can I Use Any Resin for Silicone Molds?
It’s best to use casting resin for silicone molds, as it’s formulated to cure evenly in thicker layers. Tabletop and some art resins are more for surface coatings and don’t work as well in deep molds.
How Long Does Resin Take to Cure in a Mold?
Most resins will fully cure in about 24 hours, but this can vary depending on the brand and environmental factors like temperature and humidity. Be sure to check your resin’s instructions for specific curing times.
Can I Add Paint to My Resin?
Yes! You can mix in acrylic paint, mica powder, color pastes, or use alcohol inks to color your resin. You can even use eyeshadow makeup to add color if you are feeling adventurous! Just make sure to stir thoroughly to avoid uneven color distribution.
What Safety Precautions Should I Take When Working with Resin?
Always work in a well-ventilated area and wear gloves. It’s advised to wear a mask or respirator, especially if they are sensitive to fumes. Always assume your resin will produce VOC’s (Volatile organic compounds)and wear a mask, unless it states that they are VOC free. I always go by the ‘better to be safe now, than sorry later philosophy’.
FAQ About Andy’s Art Lab
What is Andy’s Art Lab?
Andy’s Art Lab is a creative space where you can find tutorials, tips, and inspiration for all things resin art. Whether you’re a beginner or a seasoned pro, I provide easy-to-follow guides to help you master resin art.
Where Can I Find More Resin Tutorials?
You can find more in-depth guides and video tutorials on Andy’s Art Lab YouTube channel or explore our blog for tips on different resin projects.
Now that you’ve got the basics down, it’s time to start your resin art journey! Experiment, have fun, and don’t be afraid to make mistakes—that’s part of the process. Share your creations with me, and happy crafting from Andy’s Art Lab!


